What is CloudTether?
How CloudTether gets photos from your camera to the cloud in real time.
CloudTether turns your phone into a wireless tether for your camera. Connect a camera over a USB cable or over Wi-Fi, and as you shoot, each photo transfers from the camera to your phone at full resolution and then on to wherever you want it — your cloud destinations, a client gallery, an FTP server, or your phone's own photo library. No laptop, no card reader, no importing at the end of the day.
The flow
- Connect your camera to the phone (USB or Wi-Fi). Canon, Nikon, Sony and Fujifilm are supported, plus PTP cameras from other brands over USB.
- Choose where shots go. The app calls a job a shoot (older versions say session or cloud album). Pick one or more destinations for it — Dropbox, Google Drive, SmugMug, ShootProof, Lightroom, FTP/SFTP and more — or keep shots on the phone.
- Shoot. Each frame is detected the moment the camera writes it, downloaded at full resolution, and delivered automatically while you keep working. Take a test shot first: "Test shot delivered" means you're set.
Why it's efficient
Your phone uploads each photo once. CloudTether then fans that single upload out to every destination on the shoot, so you save mobile data and battery instead of uploading the same file several times. A wedding photographer can send JPEGs to a SmugMug gallery and every RAW file to Dropbox from the same upload.
You don't need Wi-Fi at the venue — your phone's mobile data handles the upload, so you're covered anywhere you have signal. With no signal at all, shots are kept on the phone and send themselves when it returns.
What you control
- What gets sent: every file, JPEGs only, or smaller copies (for example 2048 px for a same-day gallery) — set per destination.
- JPEG only: shooting RAW+JPEG? Leave the RAW files on the camera and send just the JPEGs for the fastest delivery.
- Rated send (Canon and Nikon): send only the frames you star on the camera.
- More than one camera: run two bodies into the same shoot — we've tested a Sony and a Canon together on one phone.
- Copies on this phone: keep shots in Photos or Files too, or work fully on the phone with no cloud at all.
What it isn't
CloudTether is built for capture and delivery. It isn't an editor, and it doesn't offer live view or a remote shutter — you shoot on the camera exactly as normal. Gallery services such as SmugMug and ShootProof receive JPEGs; RAW files go to storage destinations.
Connect a camera in the CloudTether app
From opening the app to your first shot arriving — over USB or Wi-Fi.
Not sure which you have? 1.1 has the tabs Home · History · Deliver · More; 1.0 has Home · Playback · Destinations · More. What changed in 1.1
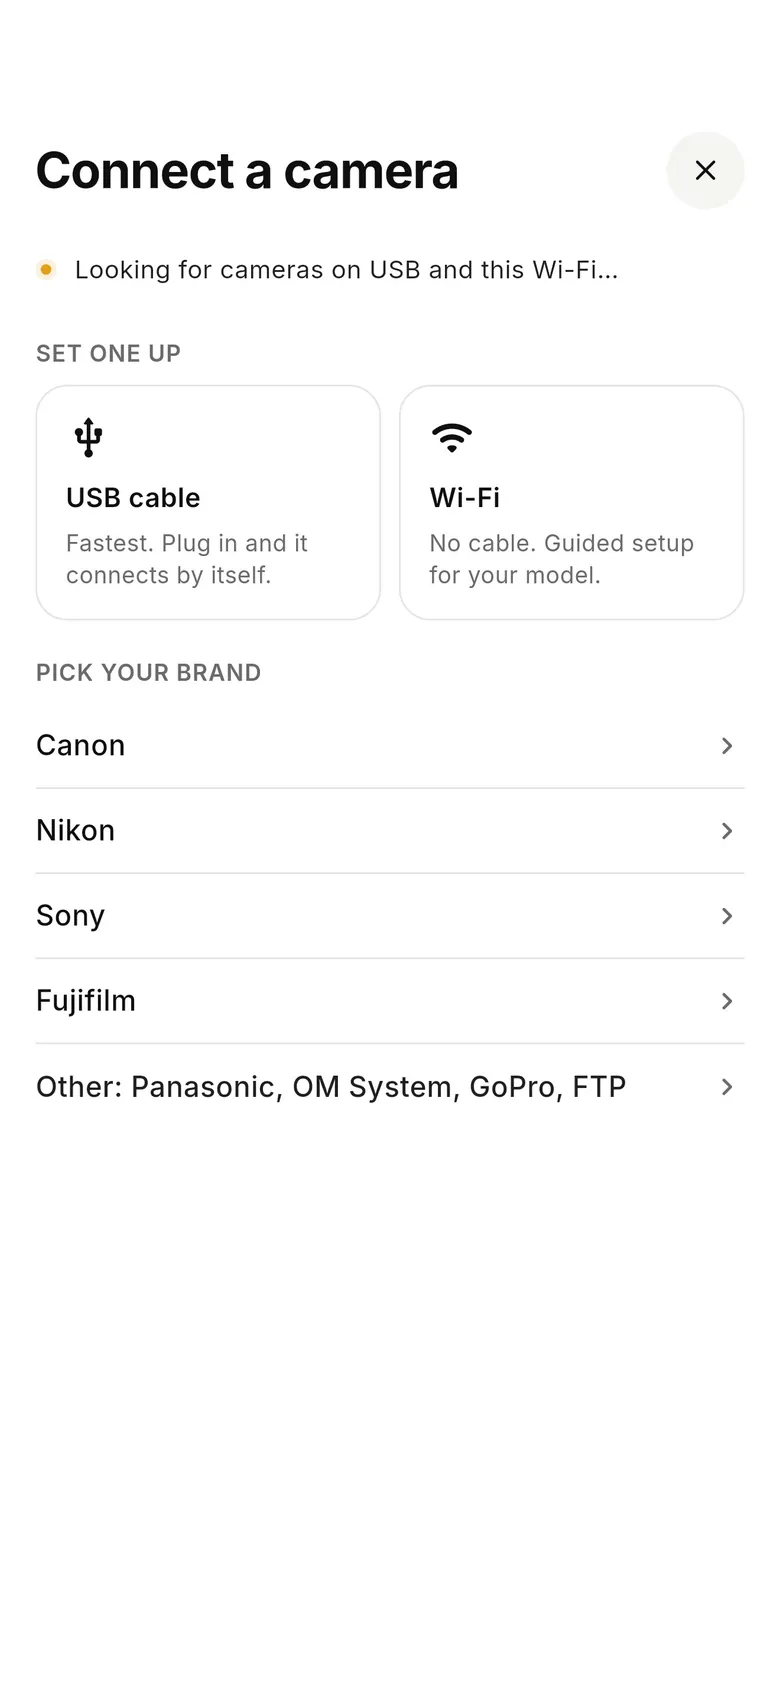
1Open Connect a camera
On Home, tap “Connect a camera” (or “+ Add” under Cameras when one is already connected). Plug in a USB cable and the camera connects by itself, or tap “Wi-Fi” for guided setup — or pick your brand (Canon, Nikon, Sony, Fujifilm, or Other: Panasonic, OM System, GoPro, FTP).
2Confirm on the camera if asked
Over Wi-Fi, many cameras show a pairing or confirm prompt the first time — accept it on the camera. Over USB, set the camera to its PC / tether mode (PC Remote on Sony).
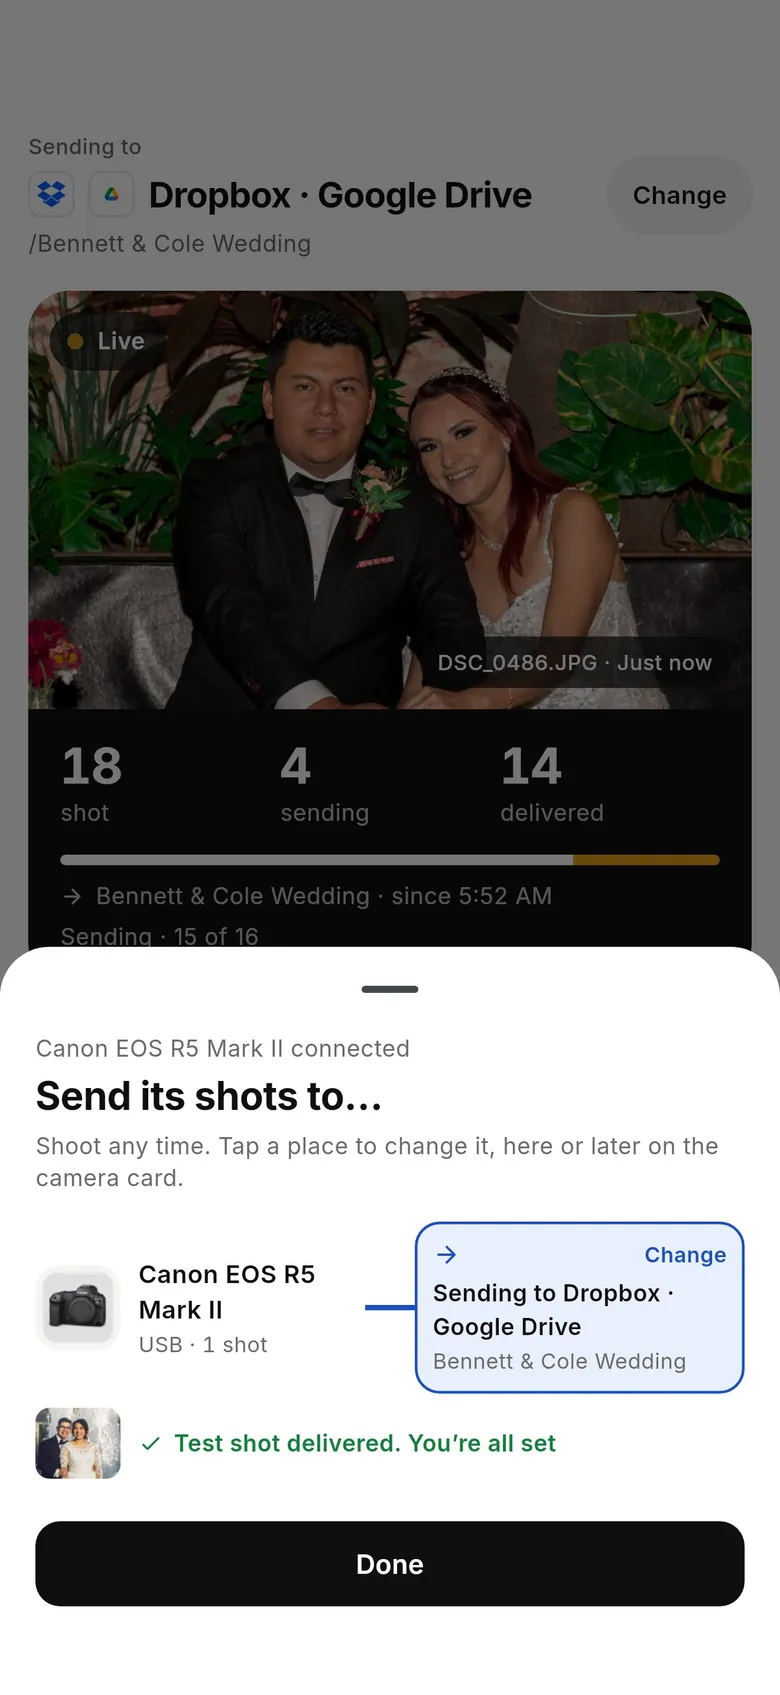
3Choose where its shots go
When the camera connects, the “Send its shots to…” sheet shows the camera and where it is sending — for example “Sending to Dropbox · Google Drive”. Tap “Change” to pick somewhere else, then take a test shot: “Test shot delivered. You’re all set” means it worked.
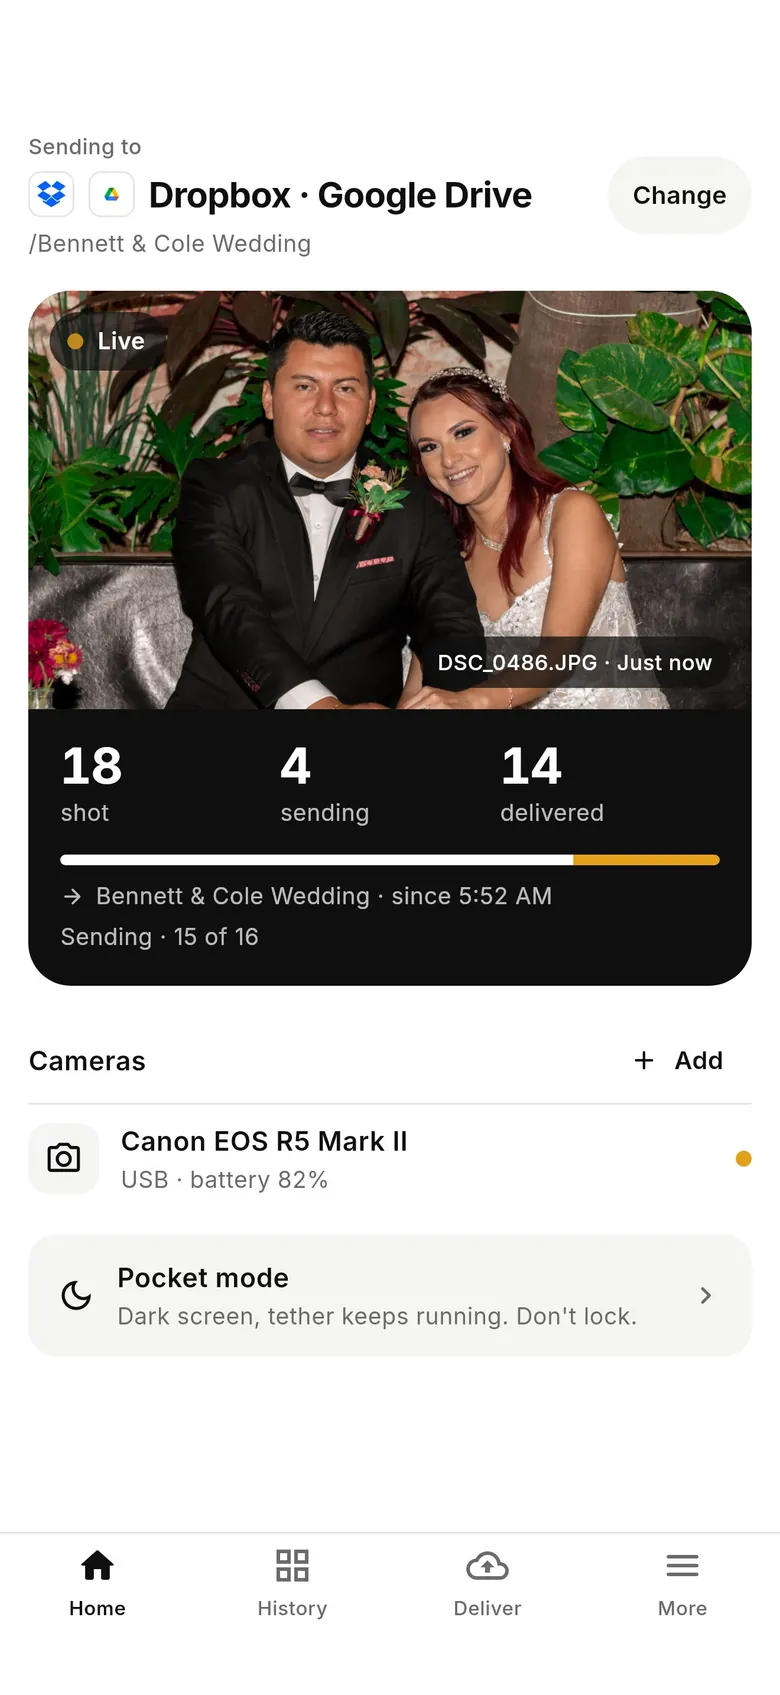
4Shoot
Home now leads with where shots are going (“Sending to Dropbox · Google Drive”, with “Change”) and a live panel of shot / sending / delivered counts. Turn on Pocket mode to darken the screen while the tether keeps running.
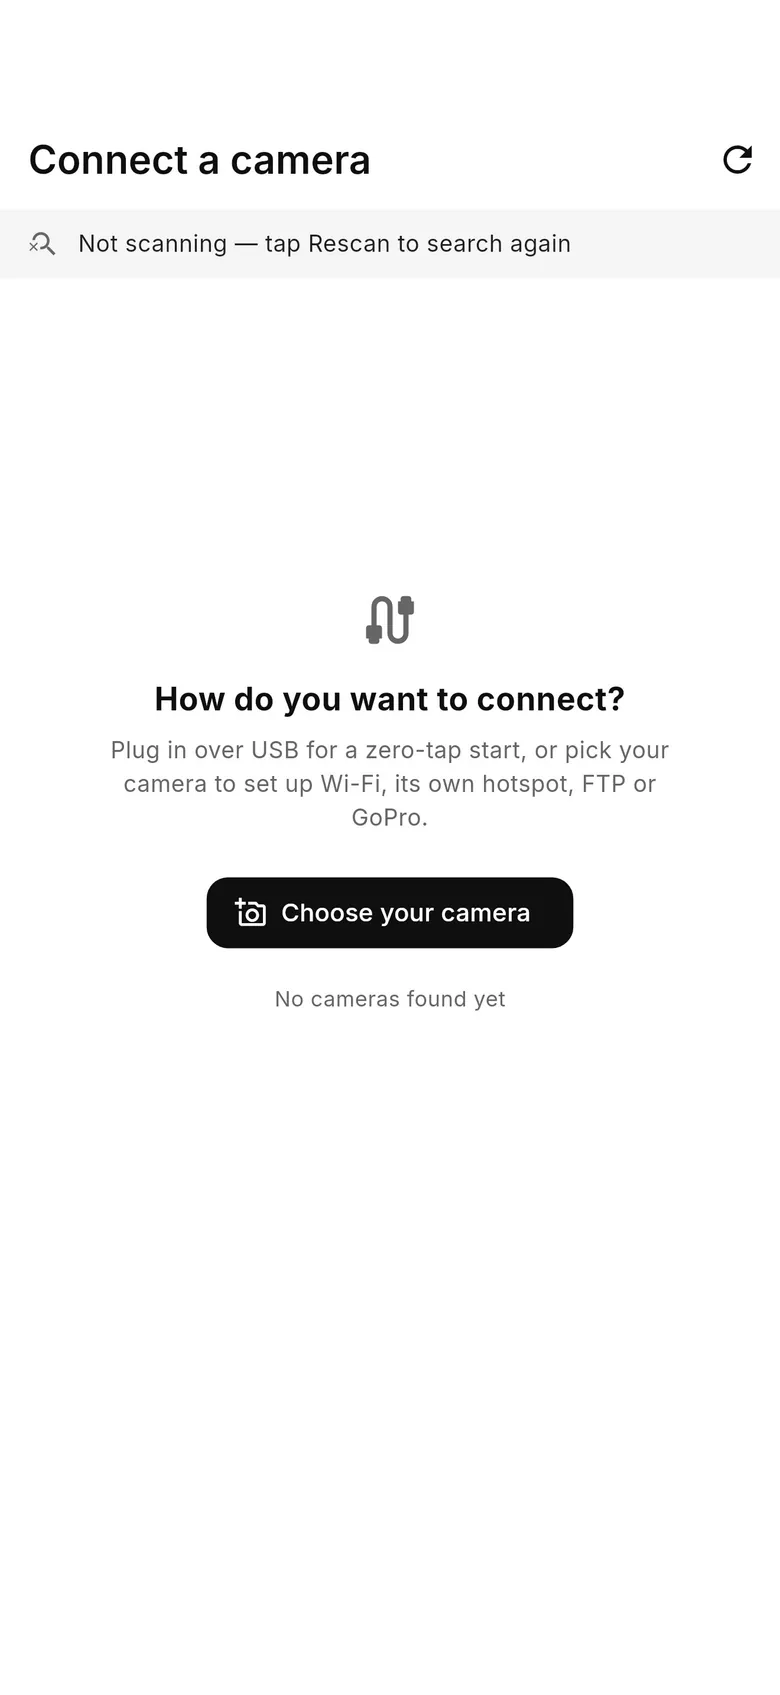
1Open Connect a camera
On Home, tap “Connect a camera” (or “+ Add camera” when one is already connected). Plug in over USB for a zero-tap start, or tap “Choose your camera” to set up Wi-Fi, the camera's own hotspot, FTP or GoPro for your model.
2Confirm on the camera if asked
Over Wi-Fi, many cameras show a pairing or confirm prompt the first time — accept it on the camera (Home shows “Confirm the connection on your camera”). Over USB, set the camera to its PC / tether mode (PC Remote on Sony).
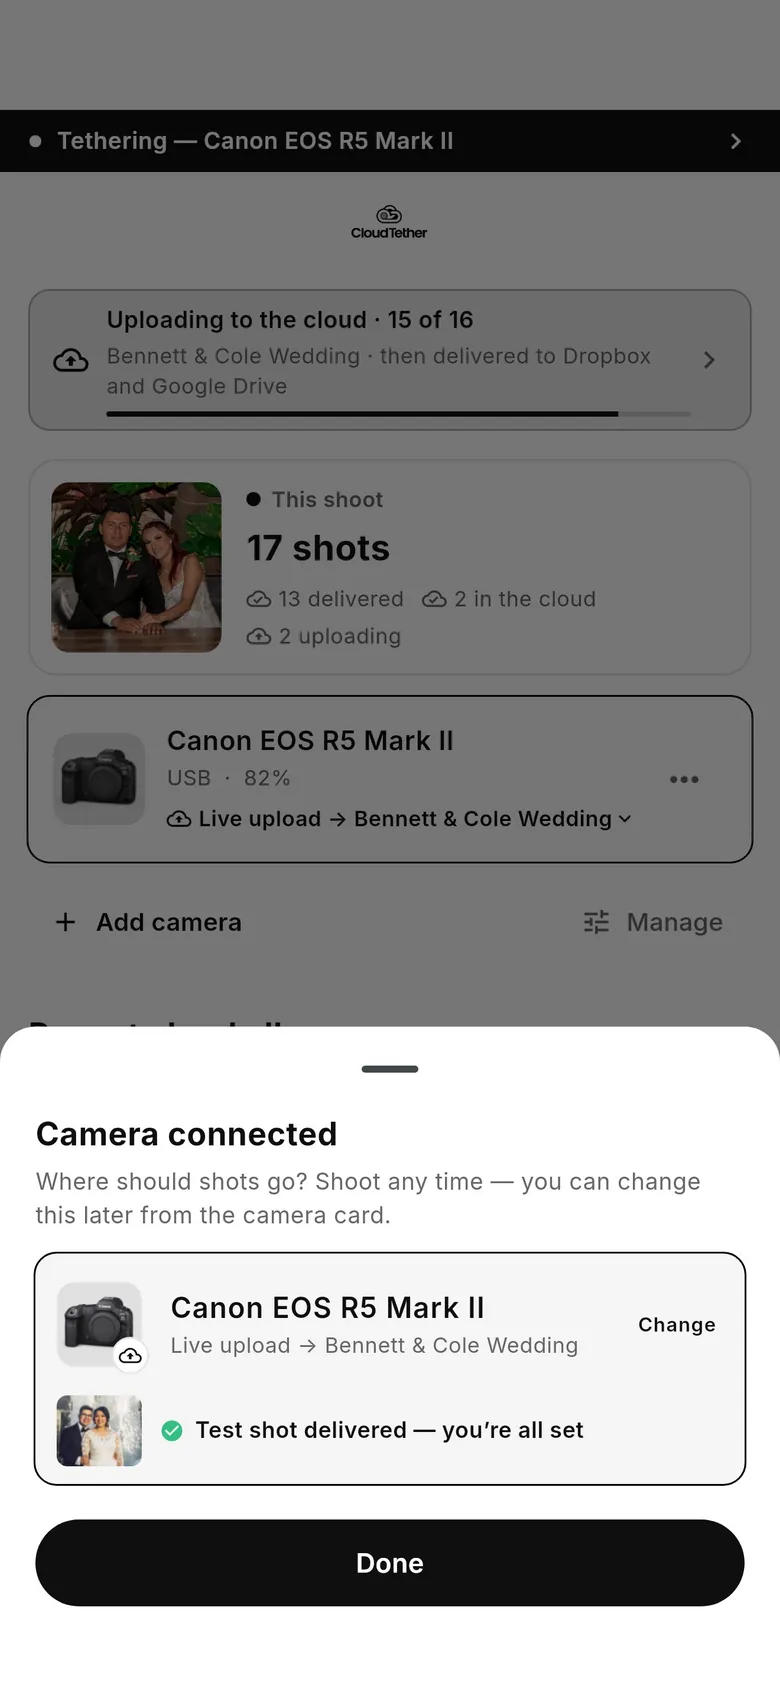
3Choose where shots go
The “Camera connected” sheet asks “Where should shots go?” and shows the camera's current album, e.g. “Live upload → Bennett & Cole Wedding”. Tap “Change” to pick another album, then take a test shot: “Test shot delivered — you’re all set”.
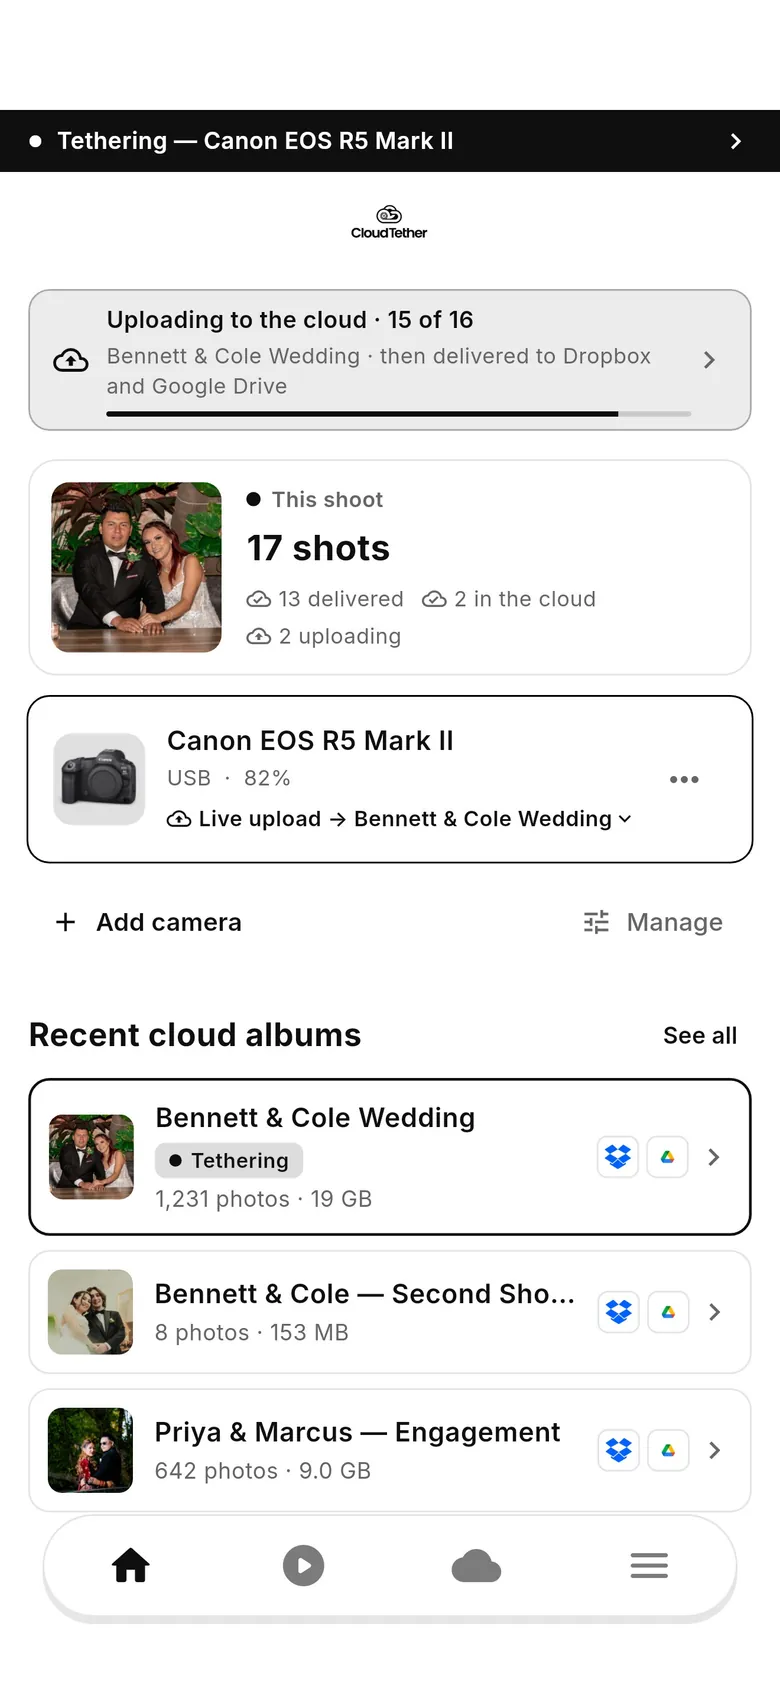
4Shoot
Home shows “This shoot” with captured, uploading, in-the-cloud and delivered counts, and the camera card's “Live upload → album” line. Recent cloud albums are listed below.