Connect over Wi-Fi
Tether wirelessly via the camera's access point or a shared network.
CloudTether can connect to your camera wirelessly using PTP/IP — the same picture-transfer protocol as USB, carried over Wi-Fi. It's ideal when a cable isn't practical (a camera on a pole or rig, roaming a venue), but it depends on radio conditions, so USB remains faster and more reliable. Canon Wi-Fi is verified; Nikon and newer Sony bodies are supported by the camera but not yet verified by us; Fujifilm Wi-Fi is experimental; Panasonic Lumix Wi-Fi isn't supported.
Two ways to set it up
Pick one — mixing them up is the most common reason a camera never appears.
1. Same network / phone hotspot (recommended)
The camera and phone join the same network: your phone's Personal Hotspot, a travel router, or a studio router. The phone keeps its internet connection for uploads, and it's the only practical way to run two wireless cameras at once (a phone can only join one camera's own network at a time).
- Use a 2.4 GHz network if your camera doesn't see a 5 GHz one.
- Avoid guest or venue networks that isolate devices from each other — the phone won't find the camera there.
2. The camera's own Wi-Fi (access point)
The camera broadcasts a network and the phone joins it. Some cameras show a QR code you can scan in the app to fill in the details. When the phone warns that the network has no internet, tell it to stay connected — CloudTether can still upload over mobile data.
Connect
- Turn on the camera's Wi-Fi remote / tether function — not its "send to smartphone" mode (see the brand notes below).
- Put the camera and phone on the network you chose.
- In CloudTether, tap Connect a camera → Wi-Fi and pick your brand. On iPhone, accept the Local Network permission the first time — nothing is found until you do.
- Approve on the camera. On a first wireless connection, many cameras (notably Canon and Nikon) ask you to confirm on the body. Watch the screen and press OK / SET, or the app sits at Pairing.
- If discovery fails, enter the camera's IP address (shown in its network information screen) in the connect screen.
Brand notes
- Canon: use Remote control (EOS Utility) — not Connect to smartphone, which only pairs with Canon's own app and never shows CloudTether's prompt. See Connect a Canon.
- Nikon: on the Z9, Z8, Z6 III and Zf, Network menu → Connect to smart device → Wi-Fi connection (STA mode) on the same network. CloudTether doesn't use Nikon's WU-1a / WU-1b adapters.
- Sony: only newer bodies (α1, α9 III, α7 IV, α7R V, α7C II) offer wireless PC Remote through an access point; most others are USB-only for tethering.
- Fujifilm: experimental — use USB for paid work.
Getting a stable link
- Keep the camera and phone close; bodies and walls between them weaken the signal.
- Turn off VPNs and any "switch to mobile data when Wi-Fi is poor" assistant that might pull the phone off the camera's network.
- Raise the camera's auto power-off — a sleeping camera drops off the network.
- Shots taken during a short dropout queue and transfer once the link is back.
Wi-Fi only links the camera to the phone. Uploads to your destinations go over the phone's mobile data or internet connection, so you don't need venue Wi-Fi. If wireless keeps failing, see Wi-Fi connection problems or switch to USB.
Connect a camera in the CloudTether app
From opening the app to your first shot arriving — over USB or Wi-Fi.
Not sure which you have? 1.1 has the tabs Home · History · Deliver · More; 1.0 has Home · Playback · Destinations · More. What changed in 1.1
1Open Connect a camera
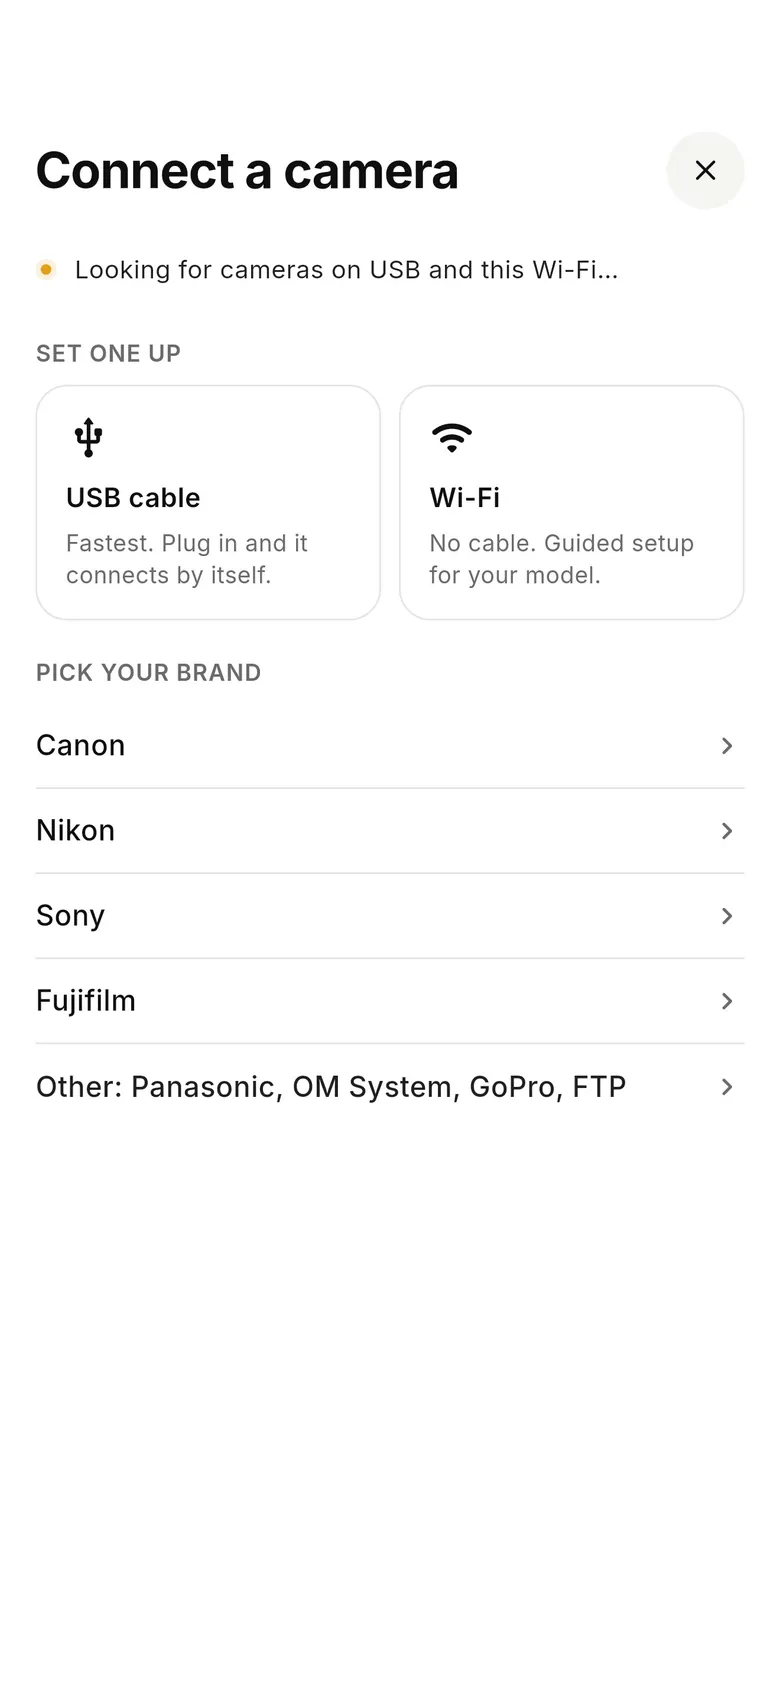
On Home, tap “Connect a camera” (or “+ Add” under Cameras when one is already connected). Plug in a USB cable and the camera connects by itself, or tap “Wi-Fi” for guided setup — or pick your brand (Canon, Nikon, Sony, Fujifilm, or Other: Panasonic, OM System, GoPro, FTP).
2Confirm on the camera if asked
Over Wi-Fi, many cameras show a pairing or confirm prompt the first time — accept it on the camera. Over USB, set the camera to its PC / tether mode (PC Remote on Sony).
3Choose where its shots go
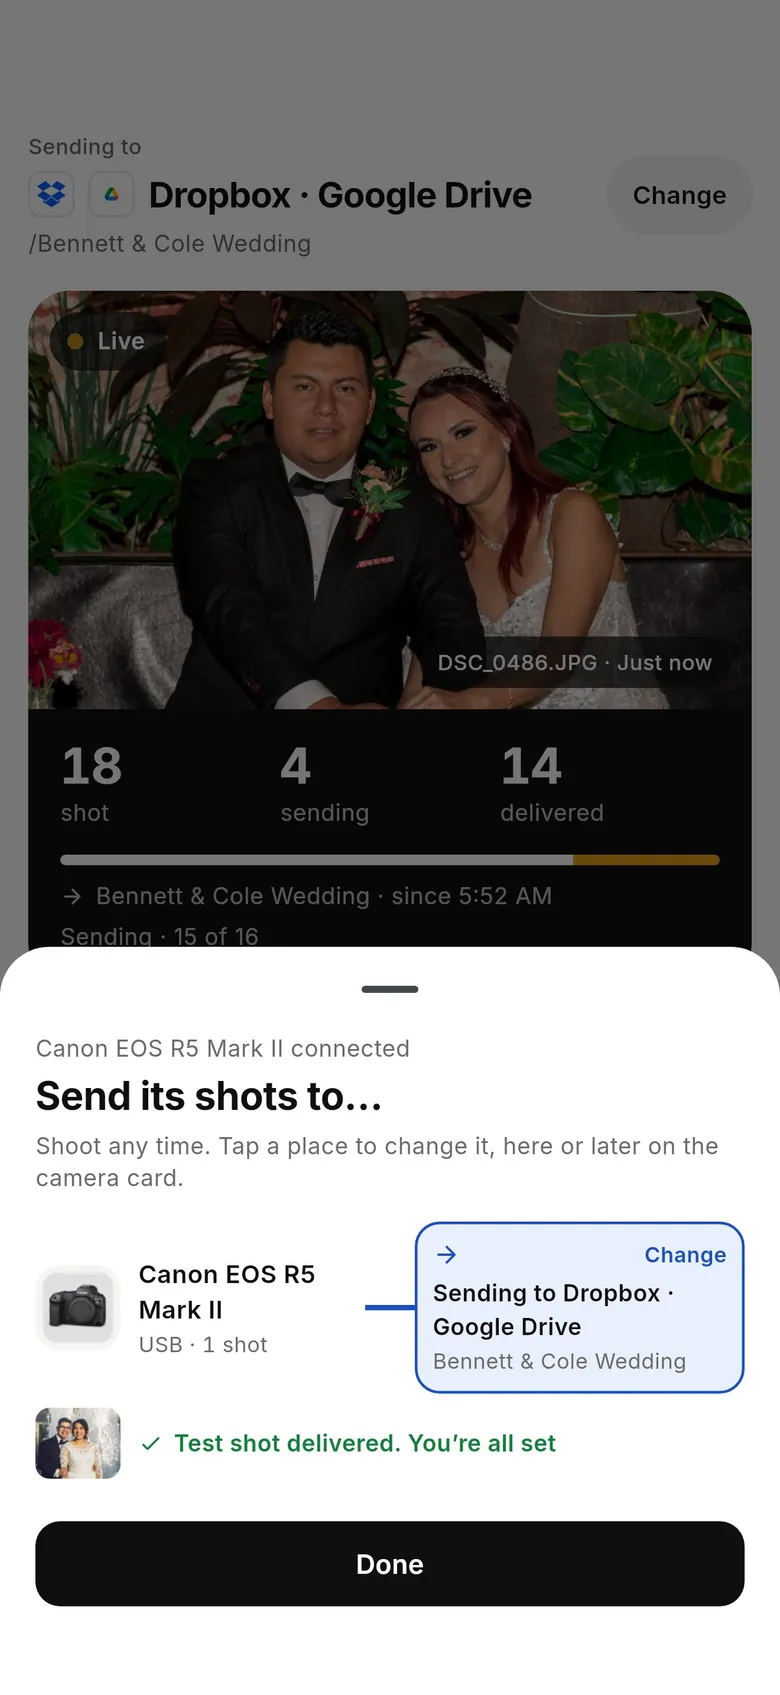
When the camera connects, the “Send its shots to…” sheet shows the camera and where it is sending — for example “Sending to Dropbox · Google Drive”. Tap “Change” to pick somewhere else, then take a test shot: “Test shot delivered. You’re all set” means it worked.
4Shoot
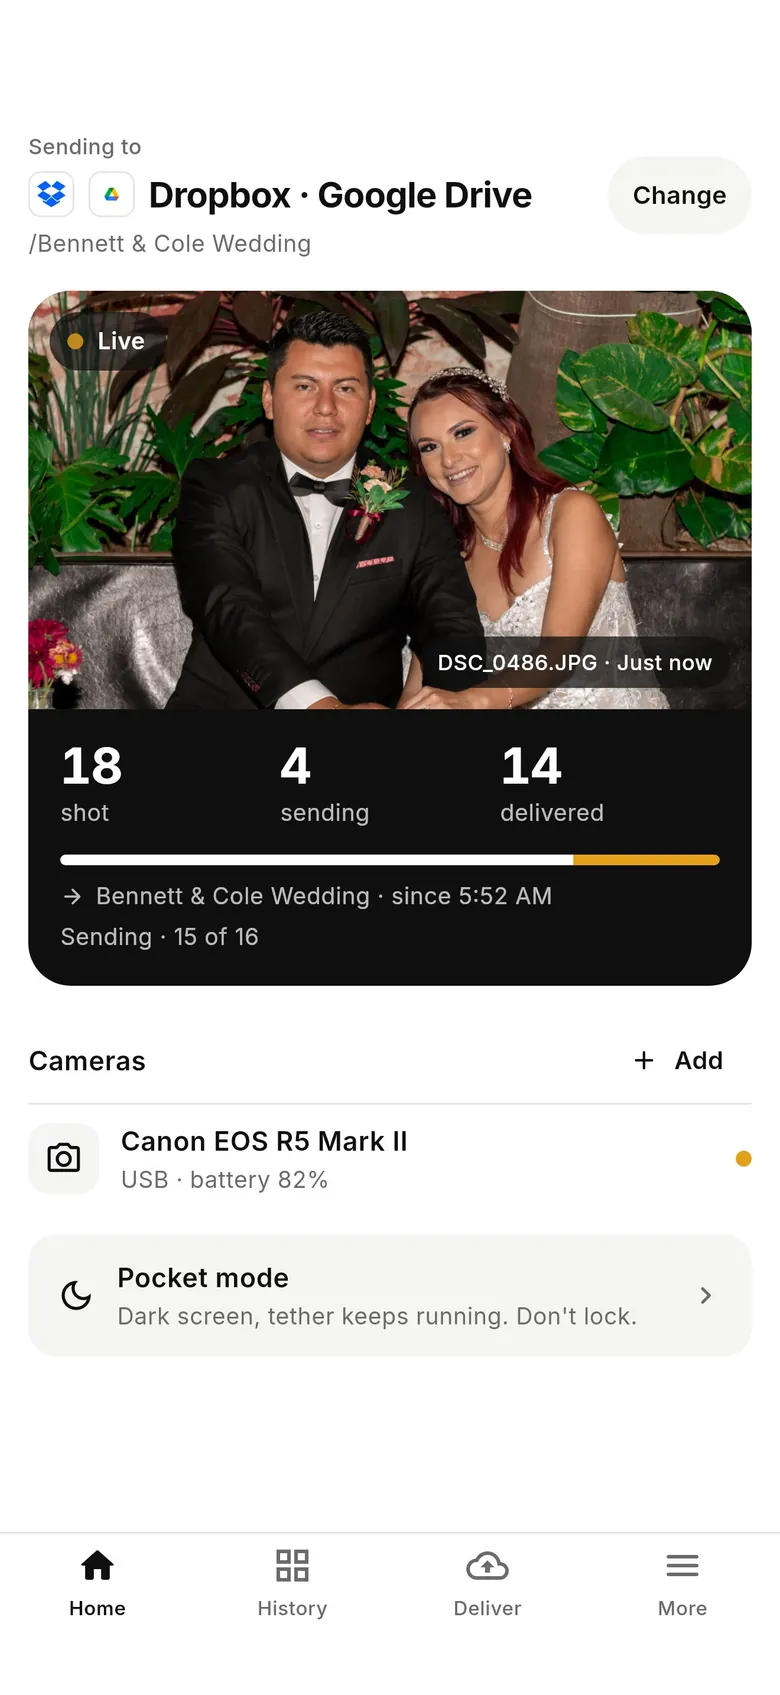
Home now leads with where shots are going (“Sending to Dropbox · Google Drive”, with “Change”) and a live panel of shot / sending / delivered counts. Turn on Pocket mode to darken the screen while the tether keeps running.
1Open Connect a camera
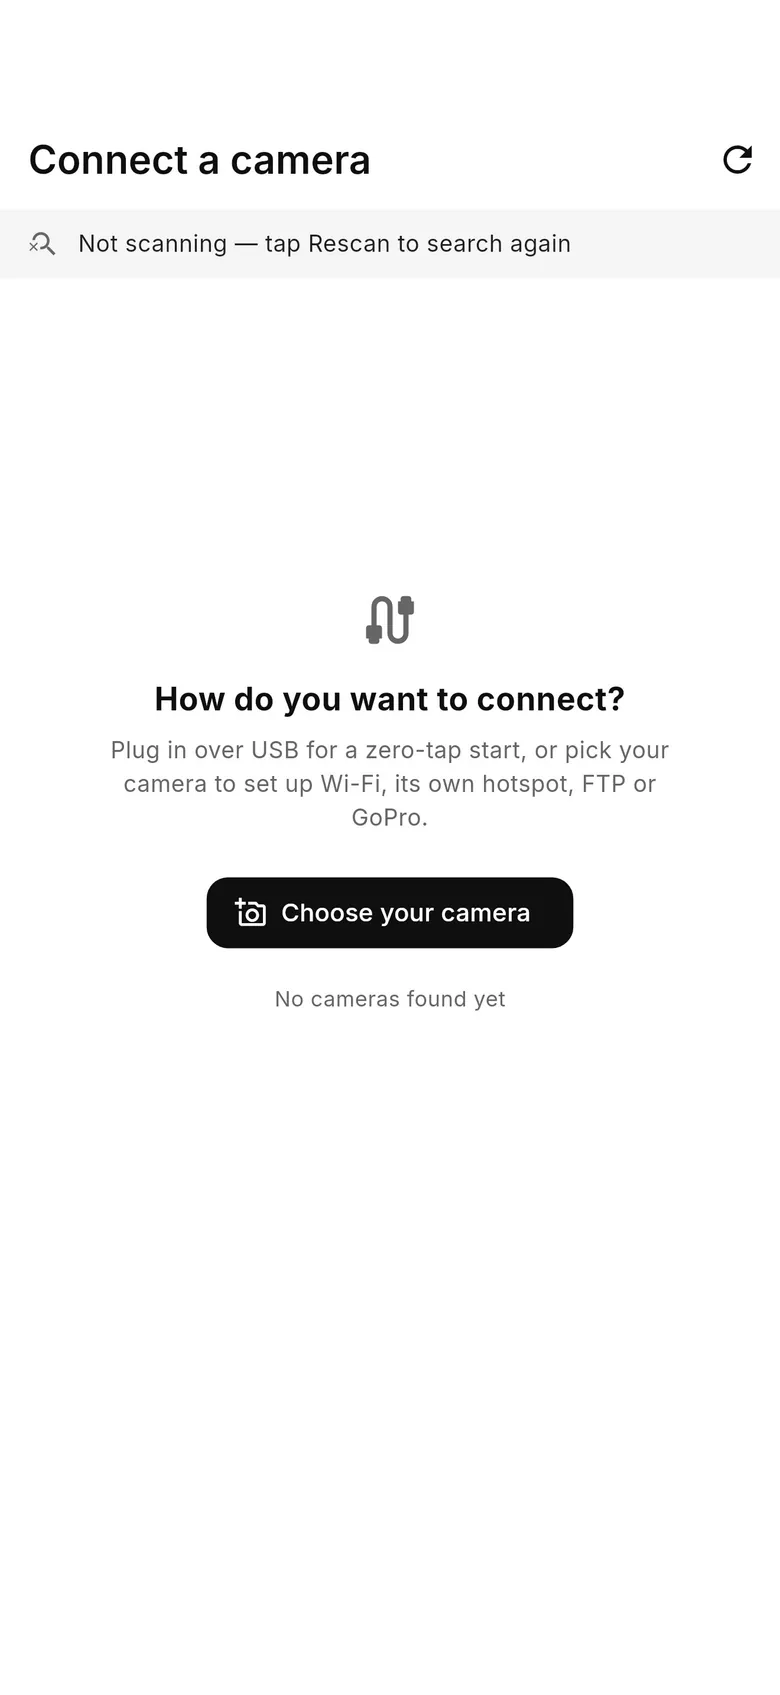
On Home, tap “Connect a camera” (or “+ Add camera” when one is already connected). Plug in over USB for a zero-tap start, or tap “Choose your camera” to set up Wi-Fi, the camera's own hotspot, FTP or GoPro for your model.
2Confirm on the camera if asked
Over Wi-Fi, many cameras show a pairing or confirm prompt the first time — accept it on the camera (Home shows “Confirm the connection on your camera”). Over USB, set the camera to its PC / tether mode (PC Remote on Sony).
3Choose where shots go
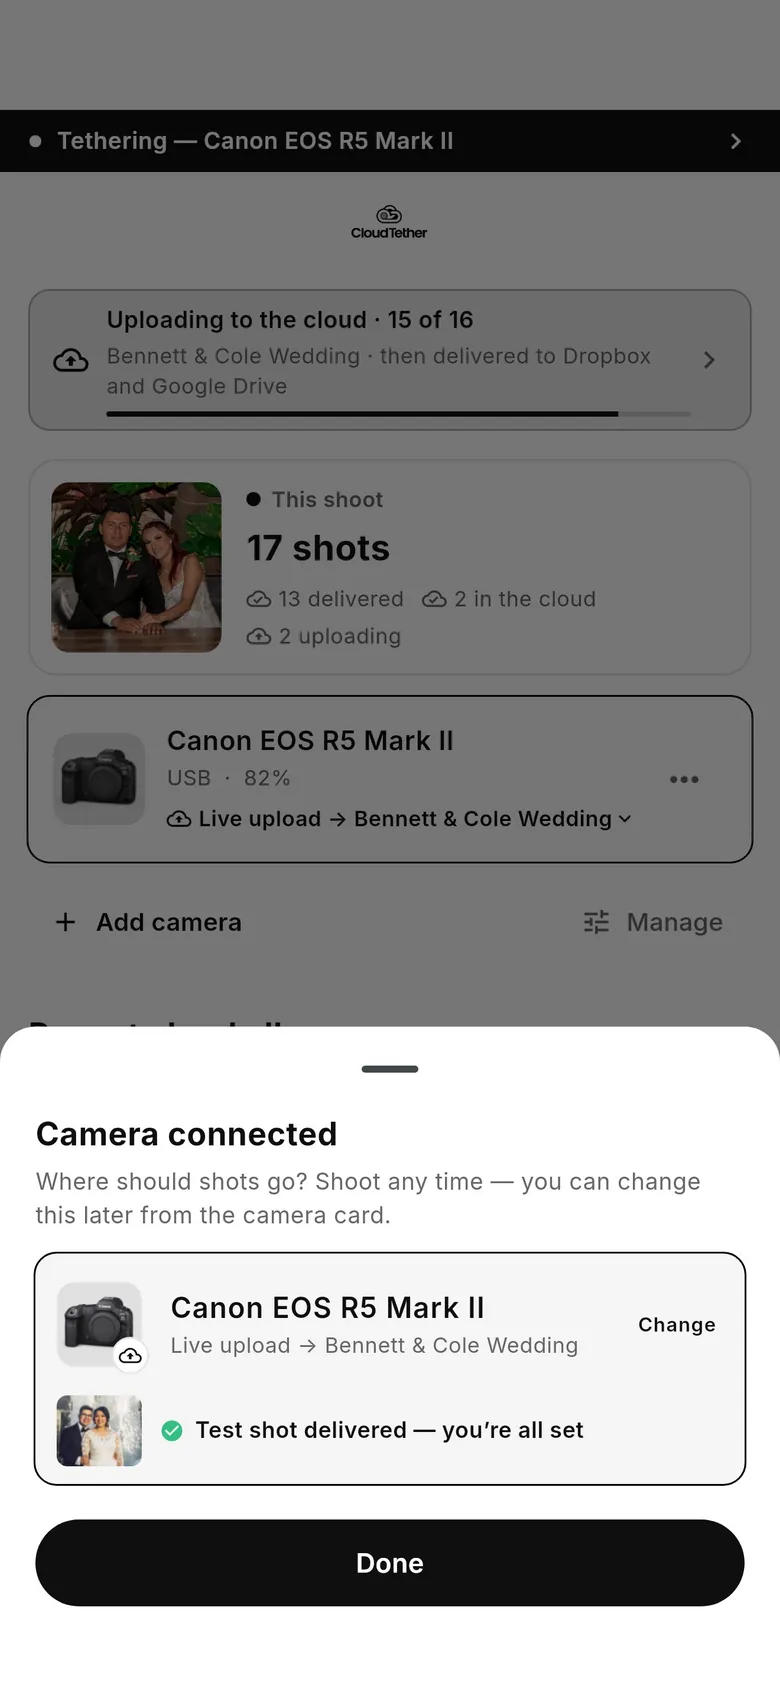
The “Camera connected” sheet asks “Where should shots go?” and shows the camera's current album, e.g. “Live upload → Bennett & Cole Wedding”. Tap “Change” to pick another album, then take a test shot: “Test shot delivered — you’re all set”.
4Shoot
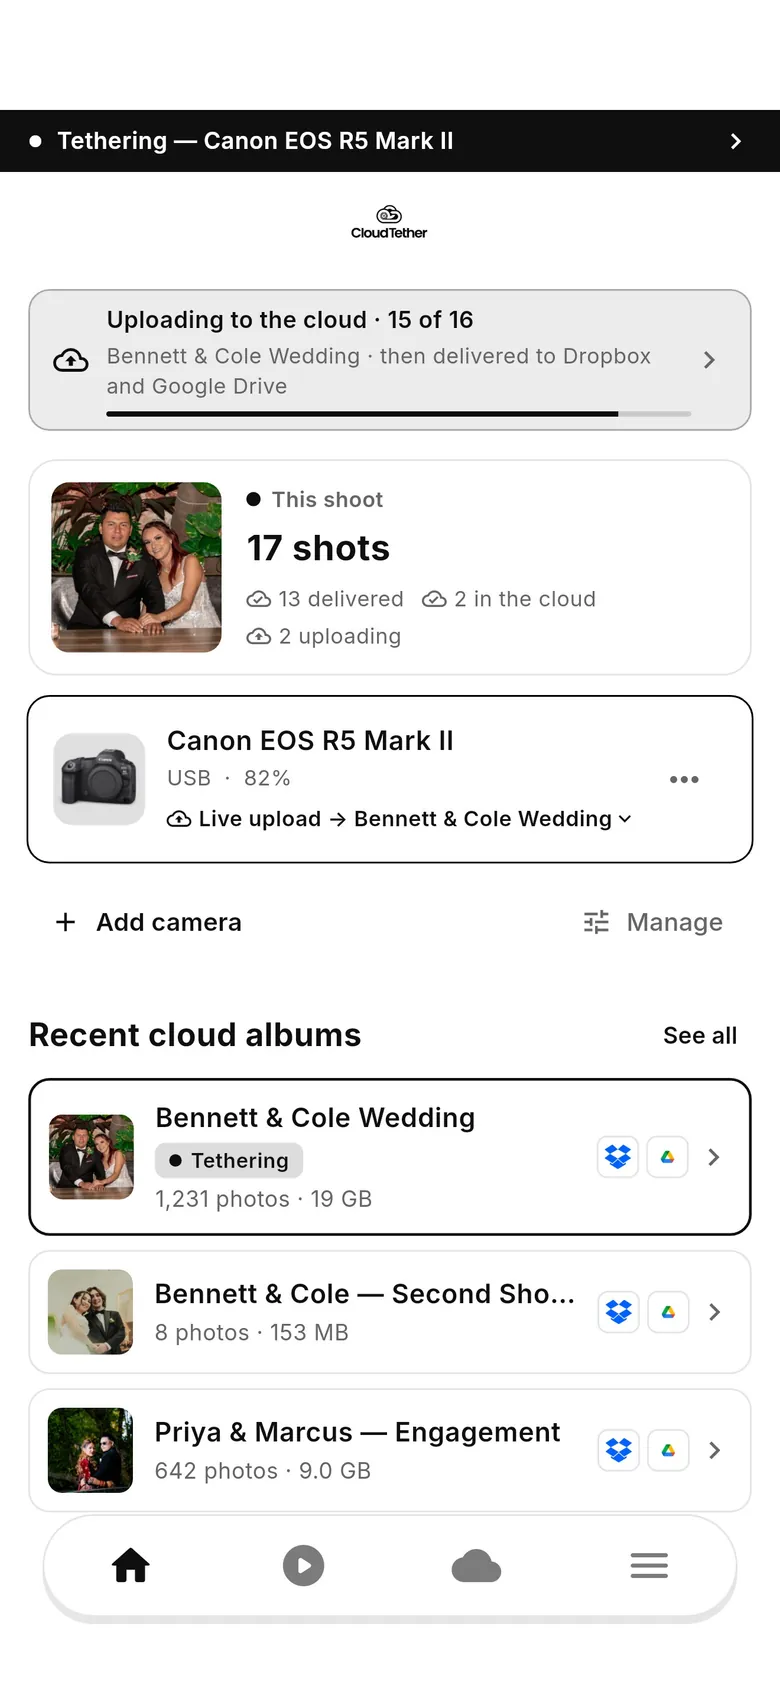
Home shows “This shoot” with captured, uploading, in-the-cloud and delivered counts, and the camera card's “Live upload → album” line. Recent cloud albums are listed below.