Connect over USB
The most reliable way to tether — a direct cable from camera to phone.
USB is the simplest and most dependable connection: no pairing, no radio interference, and in our app logs it was about three times faster than Wi-Fi on the same camera (a Canon EOS R5 Mark II JPEG reached the phone in a median 0.06 s over USB vs 0.20 s over Wi-Fi). Use it whenever a cable is practical.
What you need
- A data cable. Many USB-C cables only carry power. If the camera charges but never appears, swap the cable — the one that came with the camera is a safe bet.
- The right ends. Check the camera's port:
- USB-C (most current bodies): a USB-C to USB-C cable plugs straight into a USB-C iPhone (iPhone 15 and later), a USB-C iPad or an Android phone.
- Micro-B USB 3 (e.g. Canon 5D Mark IV, Nikon D850): a Micro-B to USB-C cable.
- Micro-USB (e.g. Sony α6400, α6600, ZV-E10) or Mini-B (older bodies): a Micro-USB or Mini-B to USB-C cable.
- A Lightning iPhone (iPhone 14 and earlier) needs Apple's Lightning to USB 3 Camera Adapter, plus a cable from the camera ending in USB-A. The adapter's Lightning port lets you charge while you tether.
- Android phones act as the USB host (USB OTG), which almost every current phone supports. If your cable ends in USB-A, add a USB-C OTG adapter.
Not sure? The tether cable picker tells you the exact cable for your camera and phone.
Length: the phone travels with you — on the strap, a belt clip or a cold-shoe mount — so the shortest cable that reaches (30 cm to 1 m) is the most reliable. Keep a spare in a pocket.
Set the camera's USB mode
The camera must talk PTP (picture transfer), not act as a card reader or webcam:
- Canon: nothing to set — but turn the camera's Wi-Fi off, as several EOS bodies disable USB while wireless is on, and make sure it isn't in a webcam/streaming mode.
- Nikon: nothing to set on current bodies. If an older body mounts as storage, choose MTP/PTP.
- Sony: set USB Connection to PC Remote (called Remote Shooting on newer menus). The ZV-E10 defaults to USB streaming and must be switched.
- Fujifilm: set the connection mode to USB TETHER SHOOTING AUTO (or FIXED).
- Panasonic Lumix: USB Mode → PC(Tether), then choose Other in CloudTether. Other PTP cameras (OM System, Leica) also connect through Other.
The brand guides have the exact menus: Canon, Sony, Nikon, Fujifilm.
Connect
- Turn the camera on and lengthen its auto power-off / standby timer so it doesn't sleep mid-shoot.
- Open CloudTether and, on Home, tap Connect a camera.
- Plug the cable in. Over USB the camera connects by itself — no brand to pick.
- Android: when asked "Allow CloudTether to access the USB device?", tap OK and tick Use by default so you're not asked again. iPhone: keep the app open the first time you connect.
- The Send its shots to… sheet shows where shots will go. Change it if needed, then take a test shot — "Test shot delivered" means you're set.
Tips for a long shoot
- Add strain relief (a cable clamp on the camera, cage or tripod) so a tug doesn't pull the plug; a right-angle plug helps next to a grip or flash.
- Keep the phone charged, and use Pocket mode to darken the screen while the tether keeps running.
- Don't run the camera maker's app or other tethering software on the same phone at the same time.
- On iPhone, a Nikon with a CFexpress card may need the card formatted in the camera before USB connects.
If nothing happens, see Camera not detected or, on Android, Camera not detected on Android (USB).
Connect a camera in the CloudTether app
From opening the app to your first shot arriving — over USB or Wi-Fi.
Not sure which you have? 1.1 has the tabs Home · History · Deliver · More; 1.0 has Home · Playback · Destinations · More. What changed in 1.1
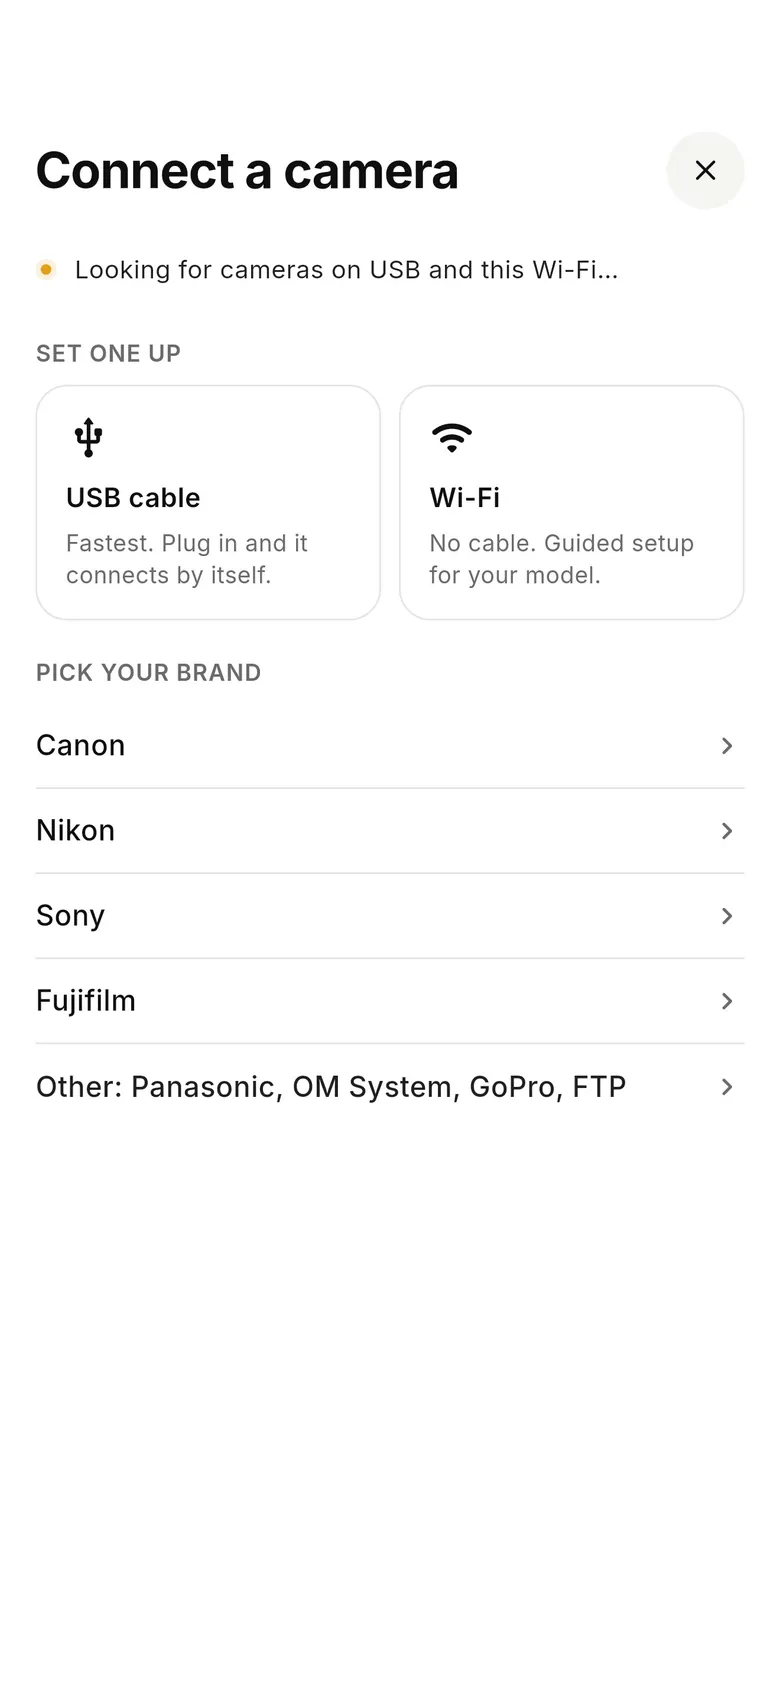
1Open Connect a camera
On Home, tap “Connect a camera” (or “+ Add” under Cameras when one is already connected). Plug in a USB cable and the camera connects by itself, or tap “Wi-Fi” for guided setup — or pick your brand (Canon, Nikon, Sony, Fujifilm, or Other: Panasonic, OM System, GoPro, FTP).
2Confirm on the camera if asked
Over Wi-Fi, many cameras show a pairing or confirm prompt the first time — accept it on the camera. Over USB, set the camera to its PC / tether mode (PC Remote on Sony).
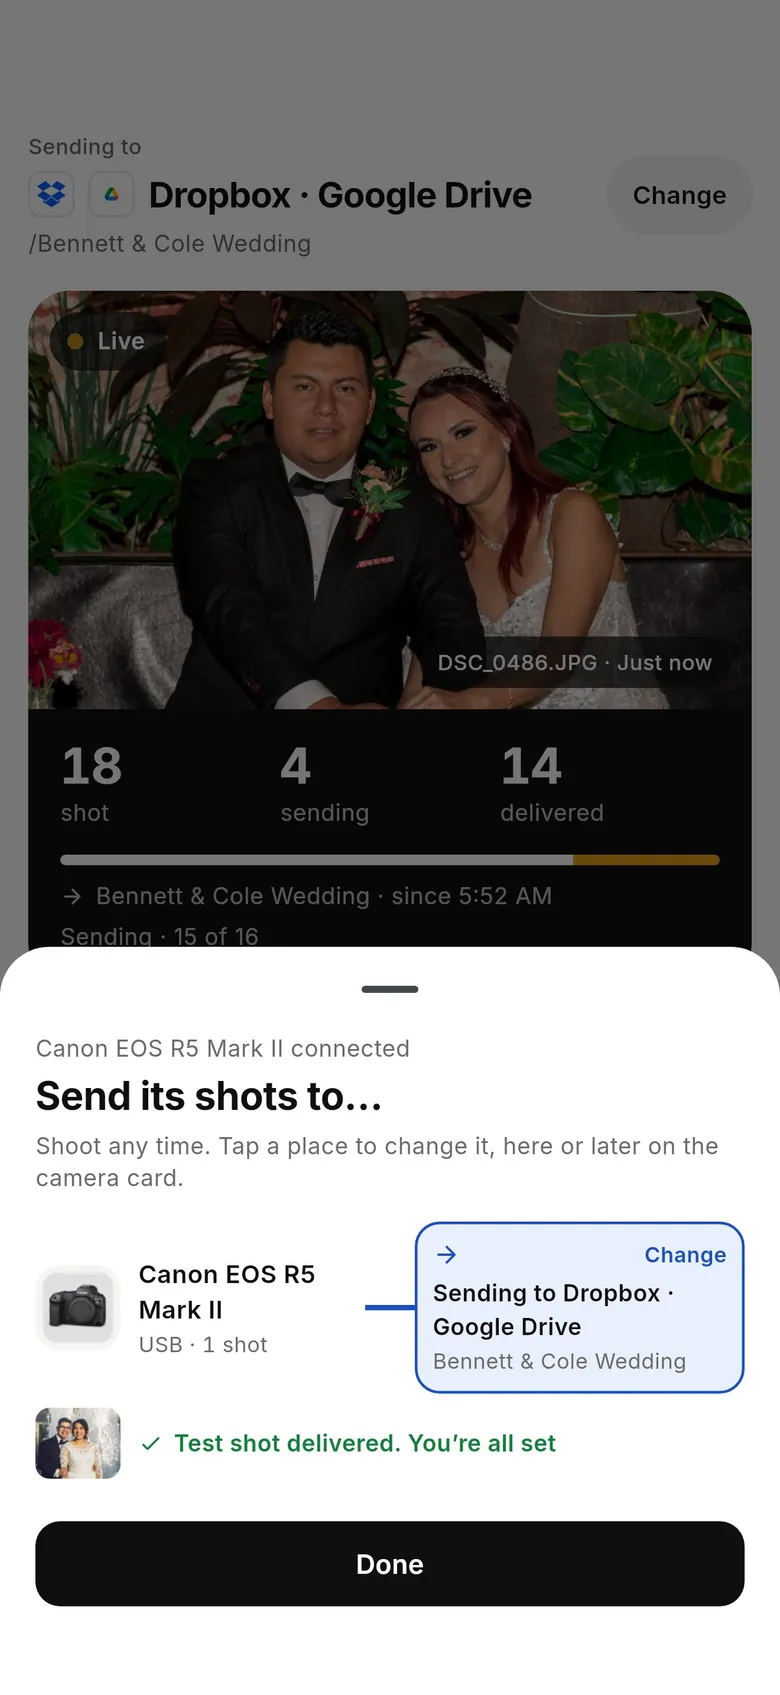
3Choose where its shots go
When the camera connects, the “Send its shots to…” sheet shows the camera and where it is sending — for example “Sending to Dropbox · Google Drive”. Tap “Change” to pick somewhere else, then take a test shot: “Test shot delivered. You’re all set” means it worked.
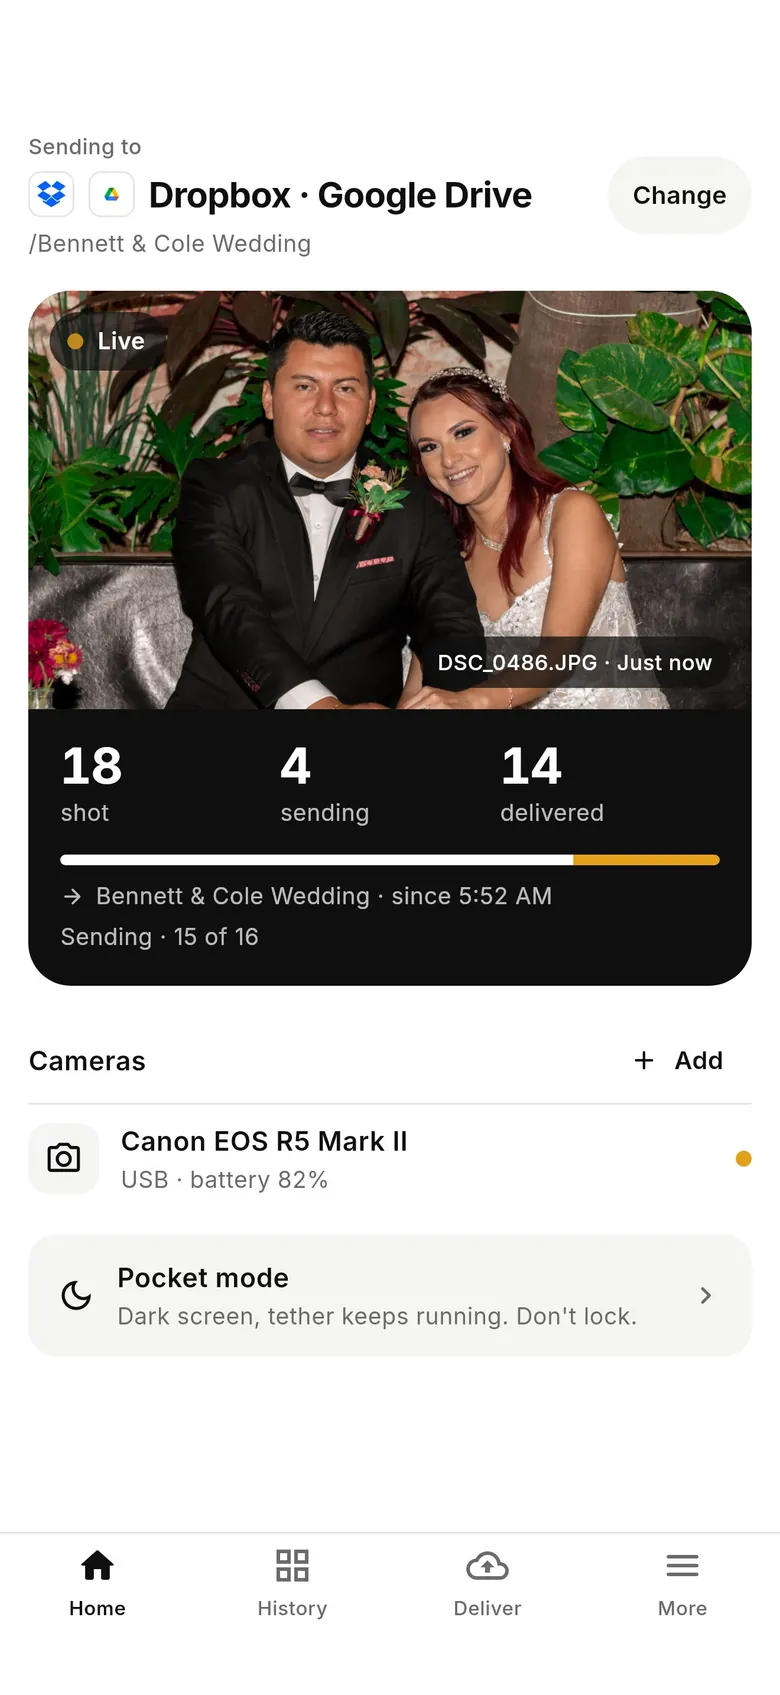
4Shoot
Home now leads with where shots are going (“Sending to Dropbox · Google Drive”, with “Change”) and a live panel of shot / sending / delivered counts. Turn on Pocket mode to darken the screen while the tether keeps running.
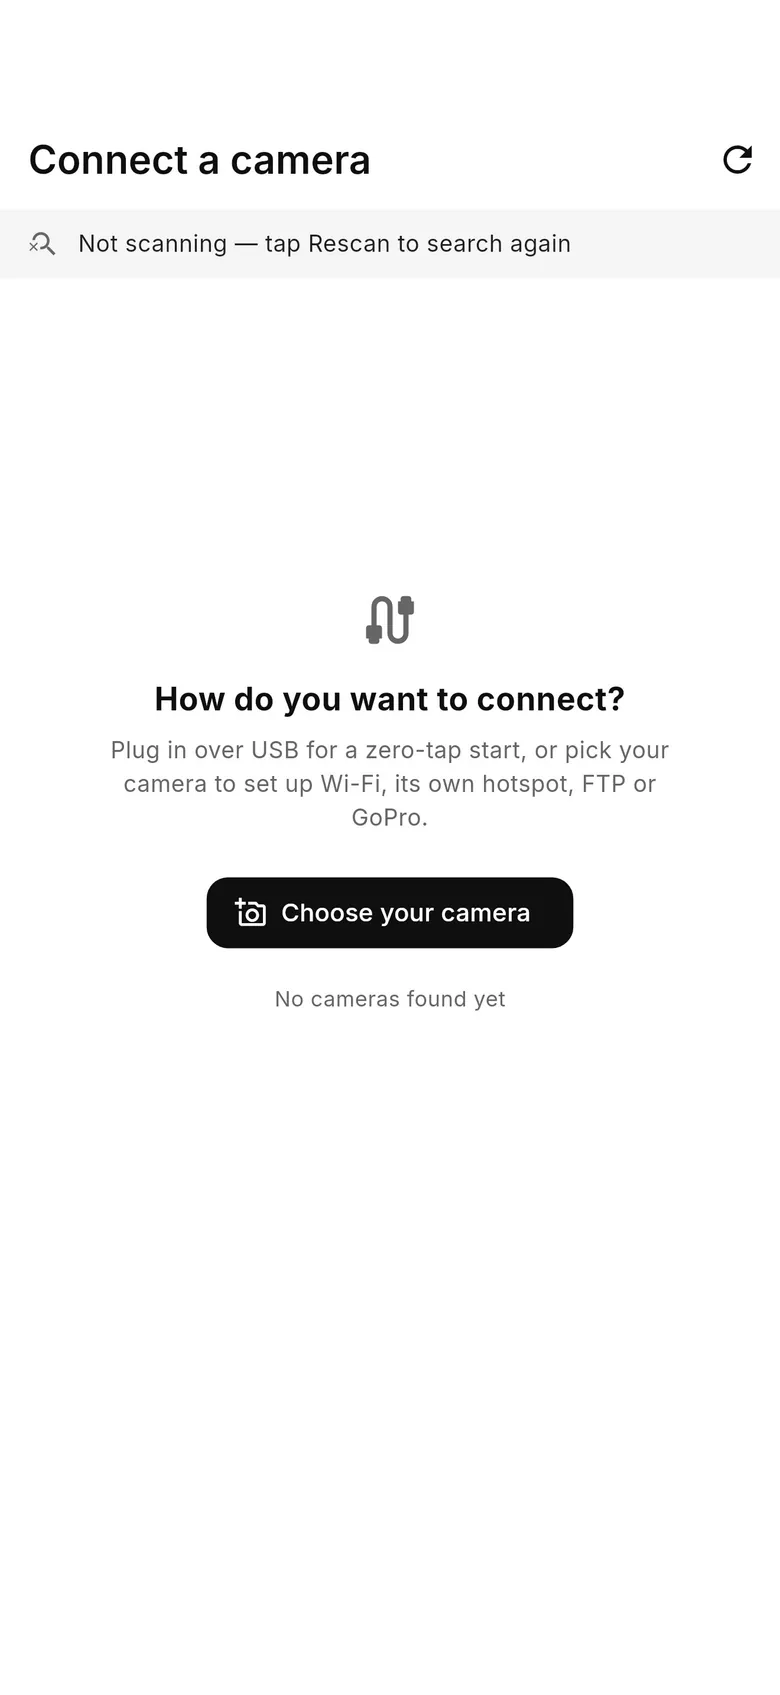
1Open Connect a camera
On Home, tap “Connect a camera” (or “+ Add camera” when one is already connected). Plug in over USB for a zero-tap start, or tap “Choose your camera” to set up Wi-Fi, the camera's own hotspot, FTP or GoPro for your model.
2Confirm on the camera if asked
Over Wi-Fi, many cameras show a pairing or confirm prompt the first time — accept it on the camera (Home shows “Confirm the connection on your camera”). Over USB, set the camera to its PC / tether mode (PC Remote on Sony).
3Choose where shots go
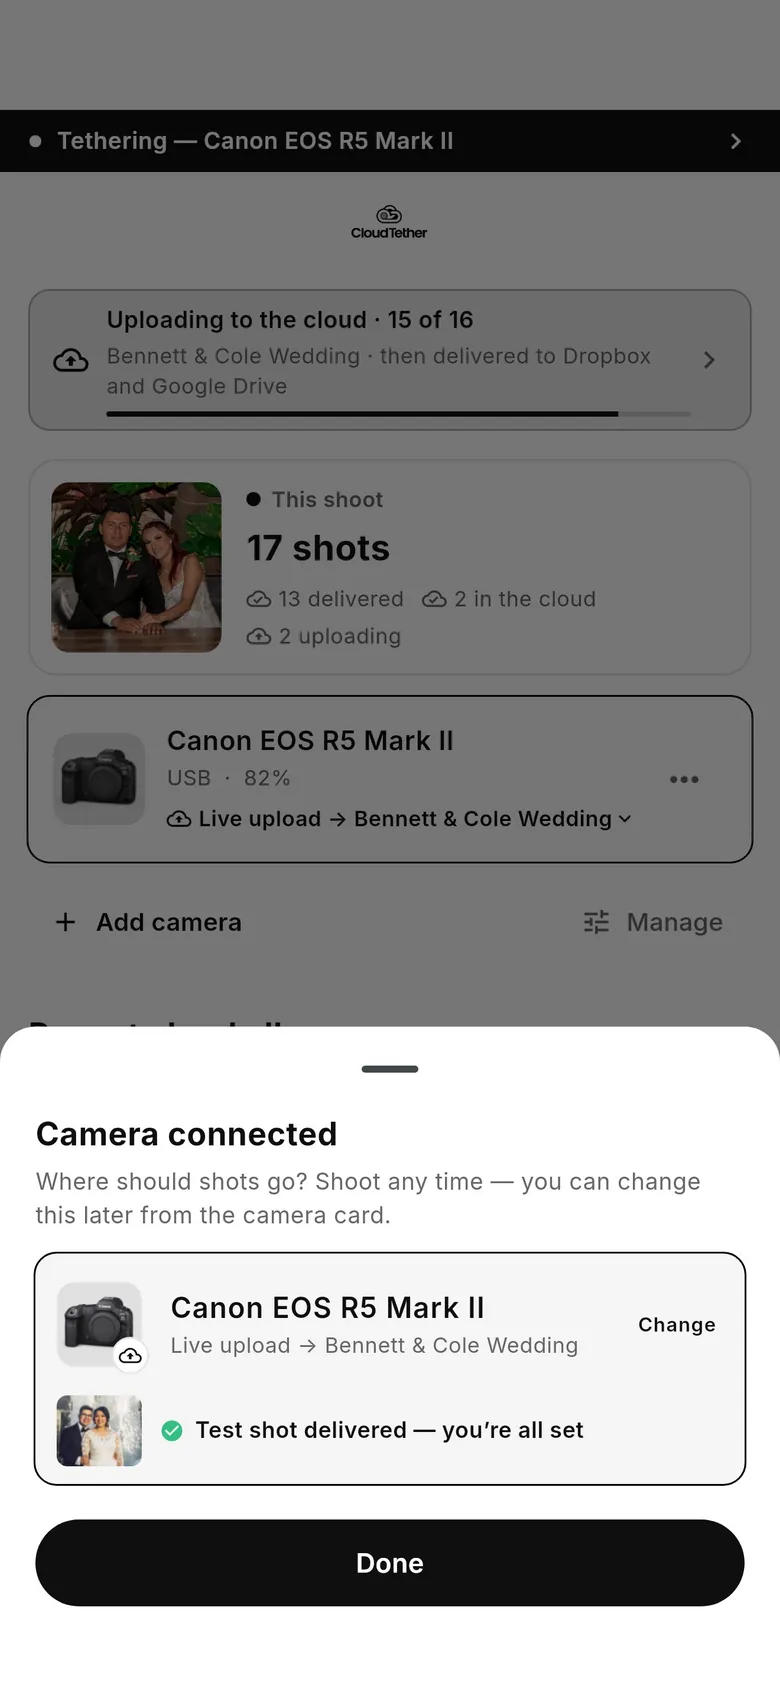
The “Camera connected” sheet asks “Where should shots go?” and shows the camera's current album, e.g. “Live upload → Bennett & Cole Wedding”. Tap “Change” to pick another album, then take a test shot: “Test shot delivered — you’re all set”.
4Shoot
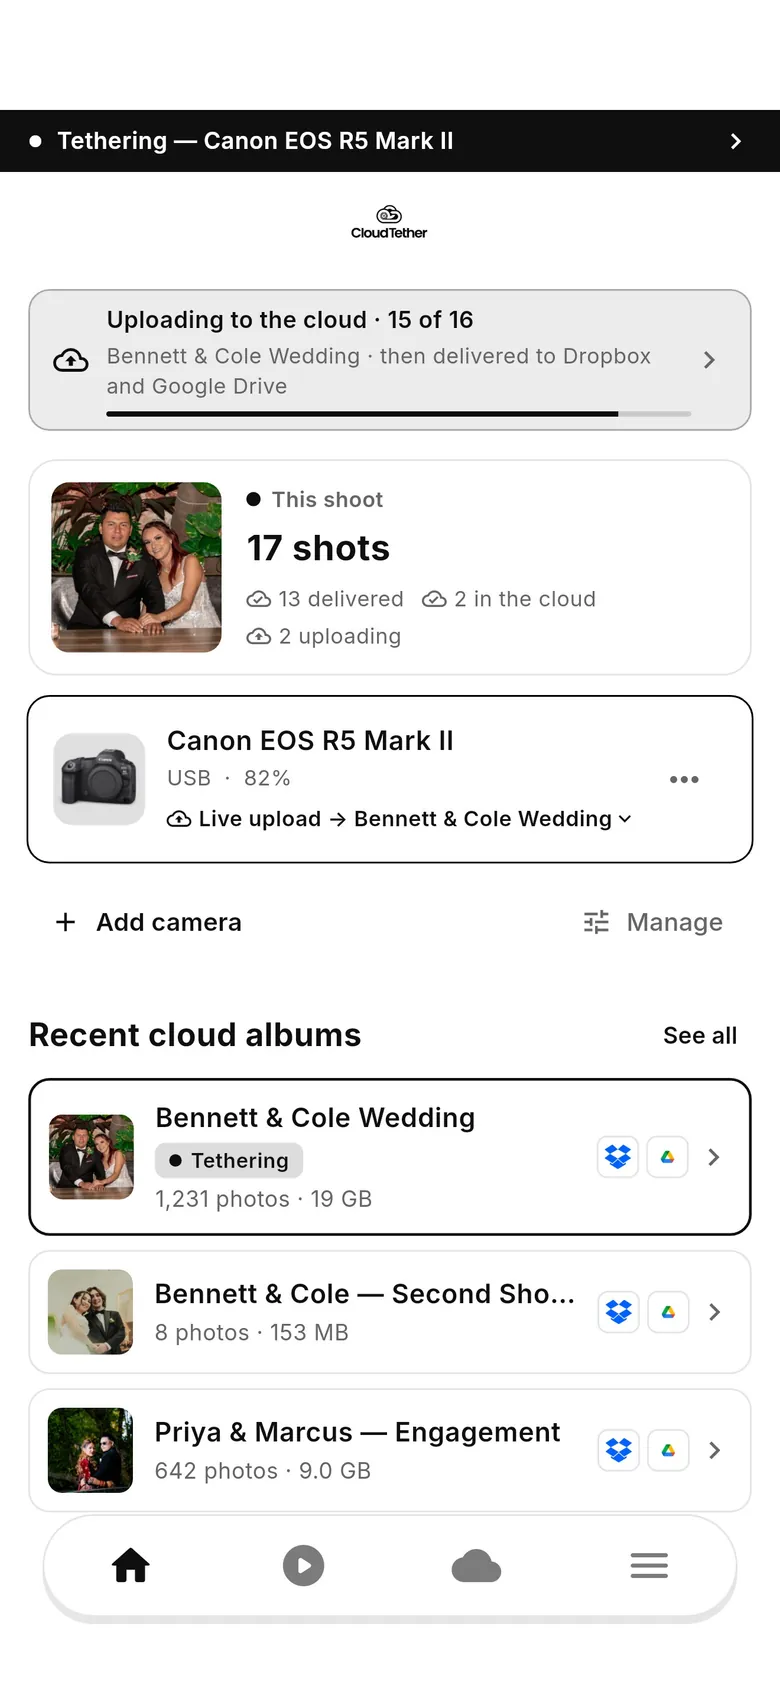
Home shows “This shoot” with captured, uploading, in-the-cloud and delivered counts, and the camera card's “Live upload → album” line. Recent cloud albums are listed below.