Tethered product photography: a step-by-step e-commerce workflow
Short answer: a good tethered product workflow locks everything down before the first frame — a shot list with SKUs, a locked-off camera, lighting and colour fixed with a grey card, a naming pattern that carries the SKU, and a preset applied on import — then tethers each frame to a computer so the art director approves on screen and the retoucher picks files up from a shared folder while you shoot the next product. The steps below take you from prep to delivery.

Why product work is tethered
E-commerce is volume and consistency: dozens or hundreds of products, each shot from the same angles, under the same light, at the same scale, so a category page looks like one set. Checking that on the camera's screen is guesswork. A tether puts every frame on a calibrated monitor beside the last one, applies the same adjustments automatically and names files so they match the catalogue — and it lets retouching start during the shoot rather than after it.
The workflow, step by step
This assumes a computer tether in Capture One or Lightroom Classic; the same structure works with a maker's utility and a watched folder.
Build the shot list
List every product with its SKU and the angles each needs (front, back, side, detail, scale, lifestyle). Agree the marketplace or site specs up front: background, aspect ratio, minimum size, margins.
Lock off the camera and set
Camera on a sturdy stand or tripod at a fixed height and distance, manual exposure, manual focus or a locked focus point, fixed focal length. Mark product positions on the table so each item goes in the same place.
Fix the light and colour
Set the lights, then shoot a grey card or colour chart. Set a custom white balance, calibrate the monitor and build a starting preset. Re-shoot the chart if the lighting changes.
Set up the tethered session
Create a session per job, a folder or segment per product, and a file-name pattern that includes the SKU and angle. Apply the preset to every capture on import.
Use a layout overlay
Load a transparent template with the crop, margins and product position as an overlay (Capture One's Overlay tool or Lightroom Classic's Loupe Overlay), so every product sits at the same scale.
Shoot, approve on screen, mark selects
Shoot each angle, compare it with the previous product, and have the art director or client approve on the monitor. Star or colour-label the selects as you go.
Hand selects to the retoucher during the shoot
Export or move approved frames into a shared folder (Dropbox, Google Drive, a server) the retoucher watches, so editing runs in parallel with shooting.
Back up and wrap
Keep the card recording as a second copy, copy the session to a backup drive at breaks, and archive the session folder at the end with the shot list ticked off.
Kit list for a tethered product set
Camera and a sharp standard or macro lens; a sturdy stand or tripod with a geared head for small adjustments; a tether cable with a lock or strain-relief clip, plus a spare; a computer on a tether table with a calibrated monitor; lights and modifiers you can reproduce; a shooting table or sweep; a grey card or colour chart; and a product prep kit — cotton gloves, a lint-free cloth, a blower, clamps, putty and pins. Mains power for the camera and computer makes a long catalogue day far less stressful.
Naming that saves hours
Put the SKU in the file name at capture, not afterwards. A pattern such as SKU, angle and sequence (for example a product code followed by front, back or detail and a number) lets the retoucher and the e-commerce team find files without a spreadsheet, and lets upload tools match images to listings automatically. Tethering software can prompt for a new name per product, or you can set the next-capture name before each item.
Consistency checks between products
Compare each new product against the last approved one side by side on the monitor: same scale, same position, same shadow. Check the background is evenly white (or whatever the spec says) — clipping on a white background shows on the histogram. Watch for dust, fingerprints and reflections; on a big screen they're easy to catch, and much cheaper to fix with a cloth than in retouching.
Getting files to the retoucher and client
The bottleneck on big catalogue days is usually the hand-off. A shared folder that syncs from the tethering computer means the retoucher starts on product one while you shoot product ten. The client sees approved frames the same way, from anywhere. Agree folder names (raw selects, retouched, final) up front so nobody overwrites anything.
When a phone tether is enough
Not every product shoot needs a computer. For simpler runs — a small shop's new stock, flat-lays, or a second camera on behind-the-scenes and social content — CloudTether can tether the camera to a phone or iPad over USB or Wi-Fi and deliver every frame straight to the shared folder the retoucher or client is watching. It has live view and a remote shutter, but no exposure control, overlays or on-set colour work, so hero sets with strict consistency still belong on a computer tether.
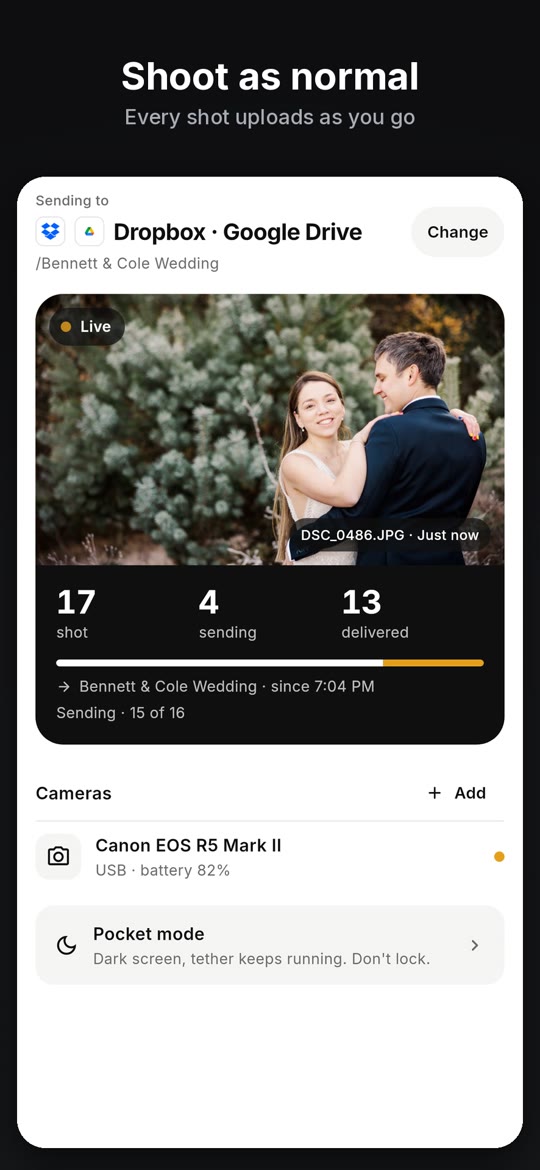
Frames to the shared folder, from a phone
The CloudTether app in 21 seconds: connect, choose where photos go, shoot, delivered.
For lighter product runs: connect, choose the folder, shoot — each frame arrives in Dropbox or Google Drive as you go.
On screen: Plug in your camera: USB cable or Wi-Fi. Choose where photos go: set it once, then just shoot. Shoot as normal: every shot uploads as you go. Camera to cloud in seconds: on your phone, then delivered. Every photo, delivered: see exactly what arrived. Dropbox, Drive, ShootProof: SmugMug, Lightroom, FTP and more. Two cameras at once: Canon, Nikon, Sony, Fujifilm.FAQ
Why tether for product photography?
To check consistency on a calibrated screen, apply the same adjustments to every frame, name files by SKU at capture and let retouching start during the shoot.
What software is best for tethered product photography?
Capture One is the long-standing studio choice; Lightroom Classic works well if your camera is on Adobe's list and you edit there.
How should I name product photos?
Include the SKU and the angle at capture, plus a sequence number, so images match listings without renaming.
How do I keep products at the same scale?
Lock off the camera at a fixed height and focal length, mark positions on the table, and use a layout overlay in your tethering software.
How do I get photos to the retoucher during the shoot?
Move approved frames into a shared folder that syncs from the tethering computer, so the retoucher works in parallel.
Can I shoot products tethered to a phone?
For simpler runs, yes: CloudTether delivers each frame to a shared folder. Use a computer tether when you need overlays, live view or on-set colour.
Tether your camera to the cloud with CloudTether
Deliver every shot to the cloud or a client gallery, live as you shoot — no laptop. Canon, Nikon, Sony and Fujifilm over USB or Wi-Fi, on iPhone, iPad or Android.