Sony α7 IV tethering settings: USB & Wi-Fi menu paths
Short answer: on the Sony α7 IV there's one setting that matters most: USB connection mode → Remote Shooting. Below is every setting a tether to your phone depends on — the menu route, what it does, the wrong choices and the symptom each one gives you — plus the sleep, cable and app steps.
New to tethering the α7 IV? Start with the overview: Sony α7 IV tethering app for iPhone & Android.
By the CloudTether team · Updated
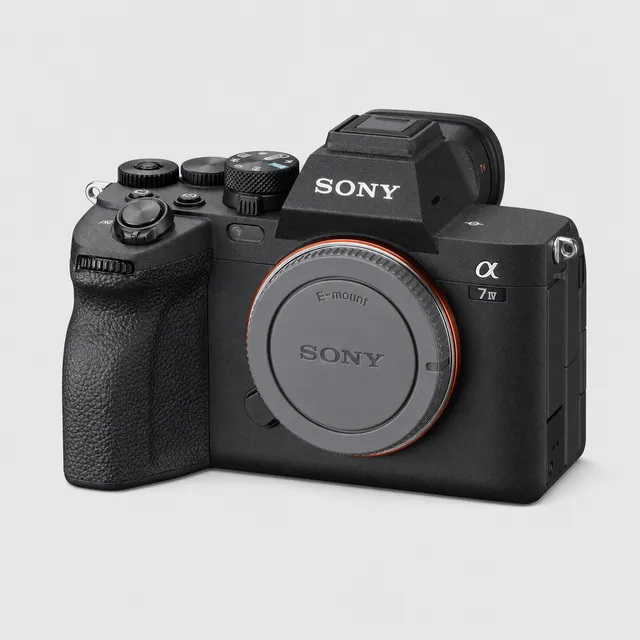
α7 IV settings at a glance
| USB mode | Remote Shooting |
|---|---|
| USB port | USB-C, SuperSpeed USB 10Gbps (USB 3.2), plus a Micro USB (USB 2.0) port |
| Wi-Fi tether | Remote shooting via Wi-Fi Access Point · Supported by the camera, not yet tested by us |
| Sleep setting | Auto power-off: long or off |
| Card backup | Still Img. Save Dest. → PC+Camera |
| Rated send | Not available — every frame is sent |
USB tethering settings on the α7 IV
The recommended connection. Set these on the camera before you plug in, in this order.
USB connection mode: Remote Shooting
- MENU
- Setup
- USB
- USB Connection Mode
- Remote Shooting
Decides what the α7 IV does when a cable goes in. Remote Shooting is the tether mode: the camera stays ready to shoot and hands every new frame to the connected phone over PTP. The other choices make it behave as a card reader or a webcam, and CloudTether can't tether either.
Remote shooting function: On
- MENU
- Network
- Cnct./Remote Sht.
- Remote Shoot Function
- Remote Shooting
- On
On the newer Sony menus the USB mode is only half the job. This switch must be On as well, or the α7 IV keeps the cable for file transfer and no frames come across.
Smartphone connection: disconnected
If the α7 IV is still paired with Imaging Edge Mobile or Creators' App, it holds the connection for that app. End the smartphone connection before plugging in.
Still Img. Save Dest.: PC+Camera
- Still Img. Save Dest.
- PC+Camera
In remote shooting the α7 IV can send frames only to the connected device. PC+Camera writes every frame to the card as well, so the card stays your backup.
Wi-Fi tethering settings on the α7 IV
CloudTether status: Supported by the camera, not yet tested by us
The α7 IV offers wireless remote shooting through an access point. We haven't tested it with CloudTether yet — treat it as try-before-you-rely.
Join an access point (Wi-Fi Connect)
Wireless remote shooting on the α7 IV goes through a network — your phone's hotspot or a router — joined with the camera's Wi-Fi Connect setting.
Connection method: Wi-Fi Access Point
- Connection method
- Wi-Fi Access Point
Tells the remote-shooting function to use that access point instead of a cable. Then pair from CloudTether and approve on the camera.
Put the camera on your phone's hotspot (2.4 GHz if the camera can't see 5 GHz) so the phone keeps its mobile data for uploads. If discovery fails, type the camera's IP address from its network information screen into the connect screen. More in Sony Wi-Fi tethering.
Common wrong settings and their symptoms
| Wrong setting | What you see | Fix |
|---|---|---|
| USB connection mode left on a file-transfer (card-reader) option | The α7 IV mounts as storage, or doesn't appear at all. | Set the USB connection mode to Remote Shooting. |
| Remote shooting function left Off | The USB mode is right, but nothing comes across. | Turn the remote shooting / PC Remote function On in the Network menu. |
| Still paired with Imaging Edge Mobile / Creators' App | The camera won't hand itself to CloudTether. | End the smartphone connection, then plug in. |
| Still Img. Save Dest. set to PC only | Shots reach the phone but the card stays empty. | Set it to PC+Camera. |
| JPEG only on in CloudTether, camera shooting RAW only | The camera connects but nothing is sent — no frame qualifies. | Set the camera to RAW+JPEG, or turn JPEG only off. |
| A charge-only USB cable | The α7 IV charges, or its screen lights up, but CloudTether never sees a camera. | Swap to a data cable — the one from the camera box is a safe bet. |
Still stuck? Sony Ctrl w/ Smartphone won't connect to Imaging Edge Mobile: fixes · Sony PC Remote not working over USB with your phone: fixes
Power and sleep settings for tethering
- Lengthen the α7 IV's auto power-off (or turn it off) for the shoot. When the camera sleeps, a USB session ends until it wakes, and on Wi-Fi it drops off the network altogether.
- During the first Wi-Fi pairing, keep the camera's screen awake — if it sleeps, the confirm prompt disappears with it.
- Android: switch battery saver off for the shoot — aggressive power management can cut USB power to accessories.
- Keep the phone charged: on a Lightning iPhone the camera adapter's Lightning port lets you charge while tethered, and CloudTether's Pocket mode darkens the screen while the tether keeps running.
Cable and port
The α7 IV has a USB-C port — small, rounded and reversible — the same plug as a USB-C phone.
| Your phone | Data cable | Adapter |
|---|---|---|
| USB-C iPhone (15 and later) | USB-C to USB-C | None |
| Lightning iPhone (14 and earlier) | USB-C to USB-A | Apple's Lightning to USB 3 Camera Adapter |
| Android phone | USB-C to USB-C | None |
Sony's spec for the α7 IV: USB-C, SuperSpeed USB 10Gbps (USB 3.2), plus a Micro USB (USB 2.0) port. The phone's port caps the link, though: standard USB-C iPhones and many Android phones run at USB 2, Pro iPhones from the 15 Pro support USB 3 with a USB 3 cable. For JPEGs it hardly matters; it shows with big RAW files.
- · Shortest cable that reaches: 30 cm to 1 m, with the phone on the strap, a belt clip or a cold-shoe mount.
- · Add strain relief — a clamp on the camera, cage or tripod — so a tug can't pull the plug; a right-angle plug helps beside a grip.
- · Tether from the USB-C port, not the α7 IV's Micro USB port (USB 2.0 only).
Then in CloudTether
Connect from Home. Tap Connect a camera and plug the α7 IV in — over a cable there's no brand to pick; it connects by itself. For Wi-Fi, choose Connect a camera → Wi-Fi → Sony instead, and accept iPhone's Local Network permission the first time.
Answer the phone's prompt. Android asks “Allow CloudTether to access the USB device?” — tap OK and tick Use by default. On iPhone, keep the app in front the first time.
Check where shots go, then test. Confirm the Send its shots to… sheet and fire one frame. “Test shot delivered” means camera, cable and destination are all right.
Optional: lighter uploads. Every frame from the α7 IV is sent (rated send is Canon and Nikon only), so JPEG only or a smaller delivery resolution keeps uploads quick.
Sony α7 IV settings FAQ
Is it called PC Remote or Remote Shooting on the α7 IV?
On the α7 IV's menus the USB connection mode reads Remote Shooting — older Sony bodies call it PC Remote. It's the same tether mode.
Why do my α7 IV shots reach the phone but not the card?
Still Img. Save Dest. is set to send to the connected device only. Change it to PC+Camera and every frame is written to the card too.
I set the USB mode but my α7 IV still won't connect — what's missing?
On the newer menus the remote shooting (PC Remote) function in the Network menu has to be On as well, and any Imaging Edge Mobile / Creators' App connection must be ended.
What cable fits the α7 IV's USB port?
The α7 IV has a USB-C port. To a USB-C iPhone or Android phone that's a USB-C to USB-C data cable; a Lightning iPhone needs Apple's Lightning to USB 3 Camera Adapter plus a USB-C to USB-A cable.
Which power setting should I change on the α7 IV before tethering?
The auto power-off. Set it long, or off, so the camera doesn't sleep between sets and break the connection.
Have these α7 IV settings been tested with CloudTether?
The menu routes come from Sony's manuals and our help centre. We haven't run this exact body ourselves (supported by the protocol, not yet tested by us), but every Sony camera uses the same CloudTether code as our verified Sony body — do a test shot before a job.