Create a session
Set up a session, choose where photos go, and start shooting.
A session is a single shoot — it groups the photos you capture and the destinations they go to.
Steps
- In the app, create a new session and give it a name (e.g. "Smith Wedding").
- Choose the destinations for this session (where photos should be delivered). You can add one or several.
- Connect your camera if you haven't already.
- Start shooting — captures appear in the session as they come in.
You can review a session's photos and their delivery status any time from the Sessions list, on the phone or the web dashboard.
Choose where a camera's shots go
Point each camera at your services — or keep its shots on the phone — and change it any time.
Not sure which you have? 1.1 has the tabs Home · History · Deliver · More; 1.0 has Home · Playback · Destinations · More. What changed in 1.1
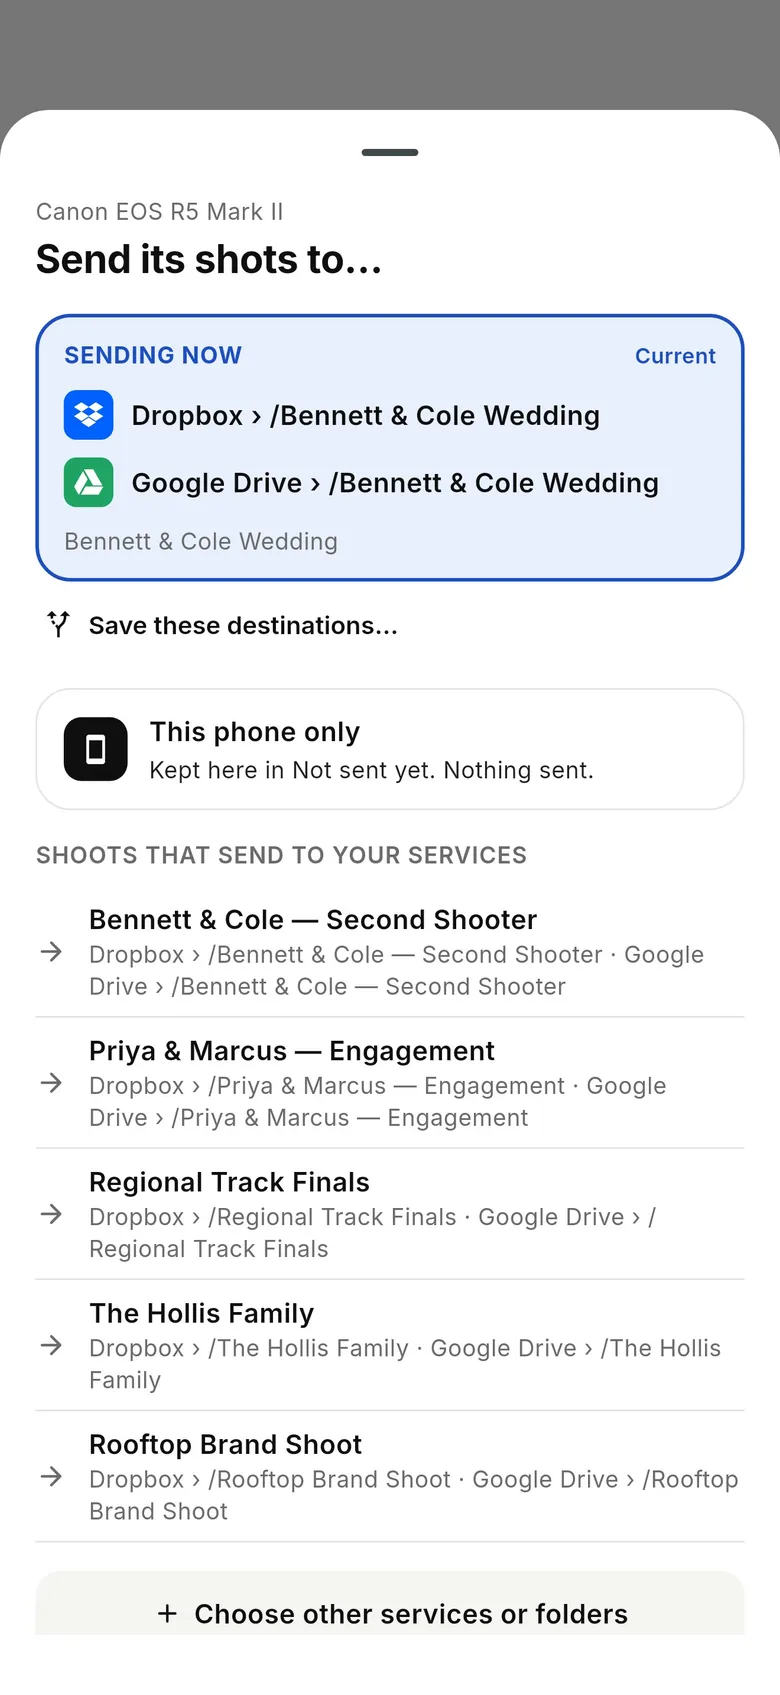
1Open “Send shots to…”
Tap “Change” next to “Sending to …” at the top of Home, or on the sheet that opens when a camera connects. “Sending now” is the current choice; under it are “This phone only” (shots are kept here in Not sent yet, or copied to Photos if you set that up), “New shoot to saved destinations” and “Shoots that send to your services”.
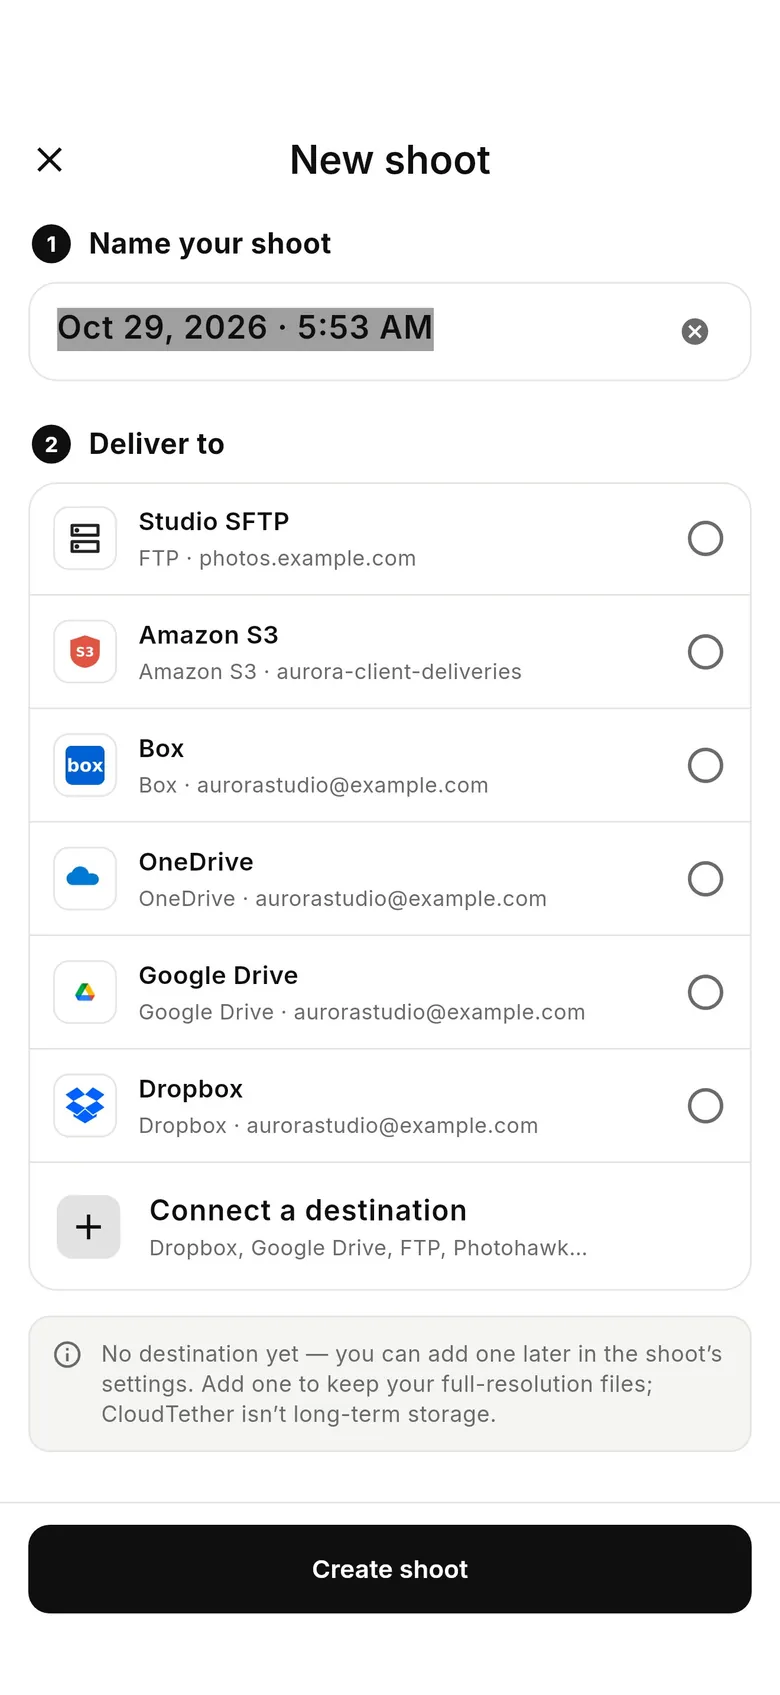
2Pick services for a new shoot
Tap “Choose other services or folders”. Name your shoot (it defaults to today's date and time), tick the services under “Deliver to” — Dropbox, Google Drive, a gallery, FTP… — and tap “Create shoot”.
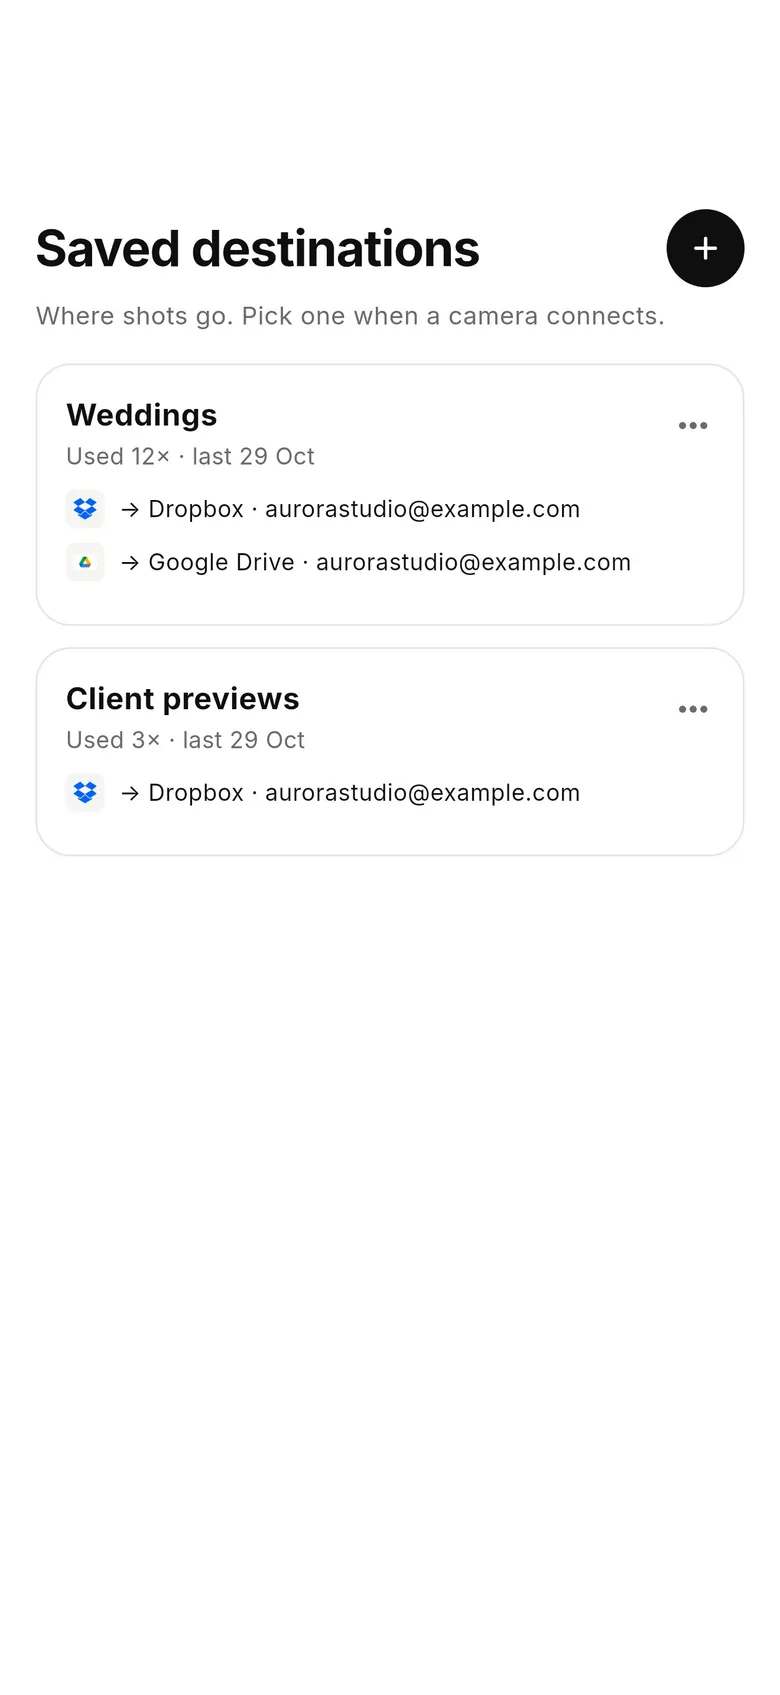
3Save the set for next time
Under the current shoot, tap “Save these destinations…” and give the set a name. It appears in Deliver › Saved destinations and as “New shoot to saved destinations” in the picker — one tap starts a new shoot, named for today, on the same services.
4Reconnecting later
Each camera remembers its choice. Reconnect the same day and it rejoins that shoot; on a later day it starts a new shoot on the same destinations, so next week's job never lands in last week's folder.
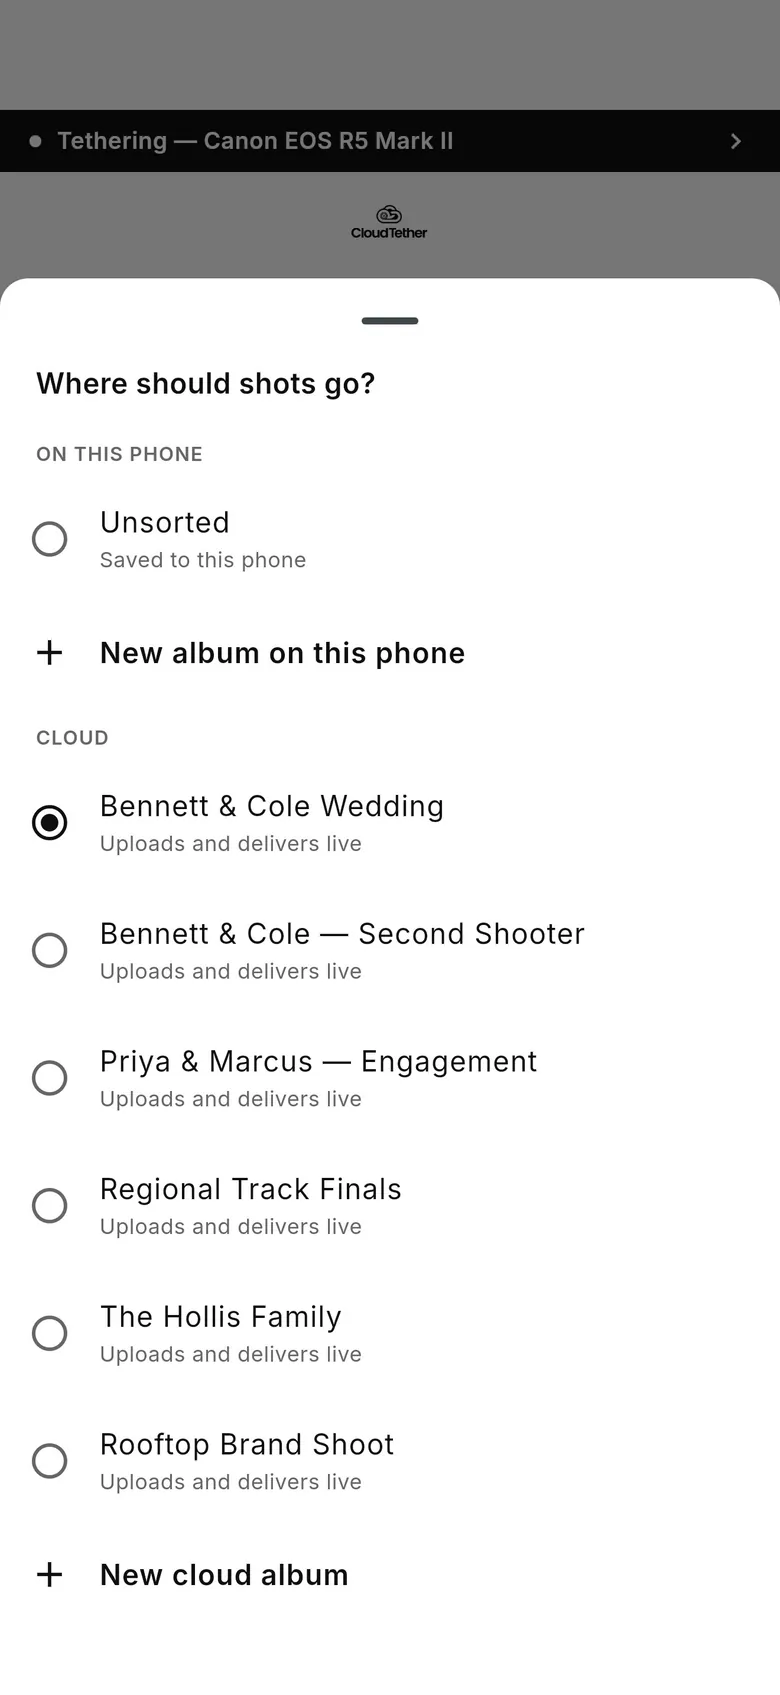
1Open “Where should shots go?”
Tap “Change” on the Camera connected sheet, or the camera's “Live upload → …” line on Home. Pick “Unsorted” (saved to this phone) or an album on this phone under “On this phone”, or a cloud album — which uploads and delivers live — under “Cloud”.
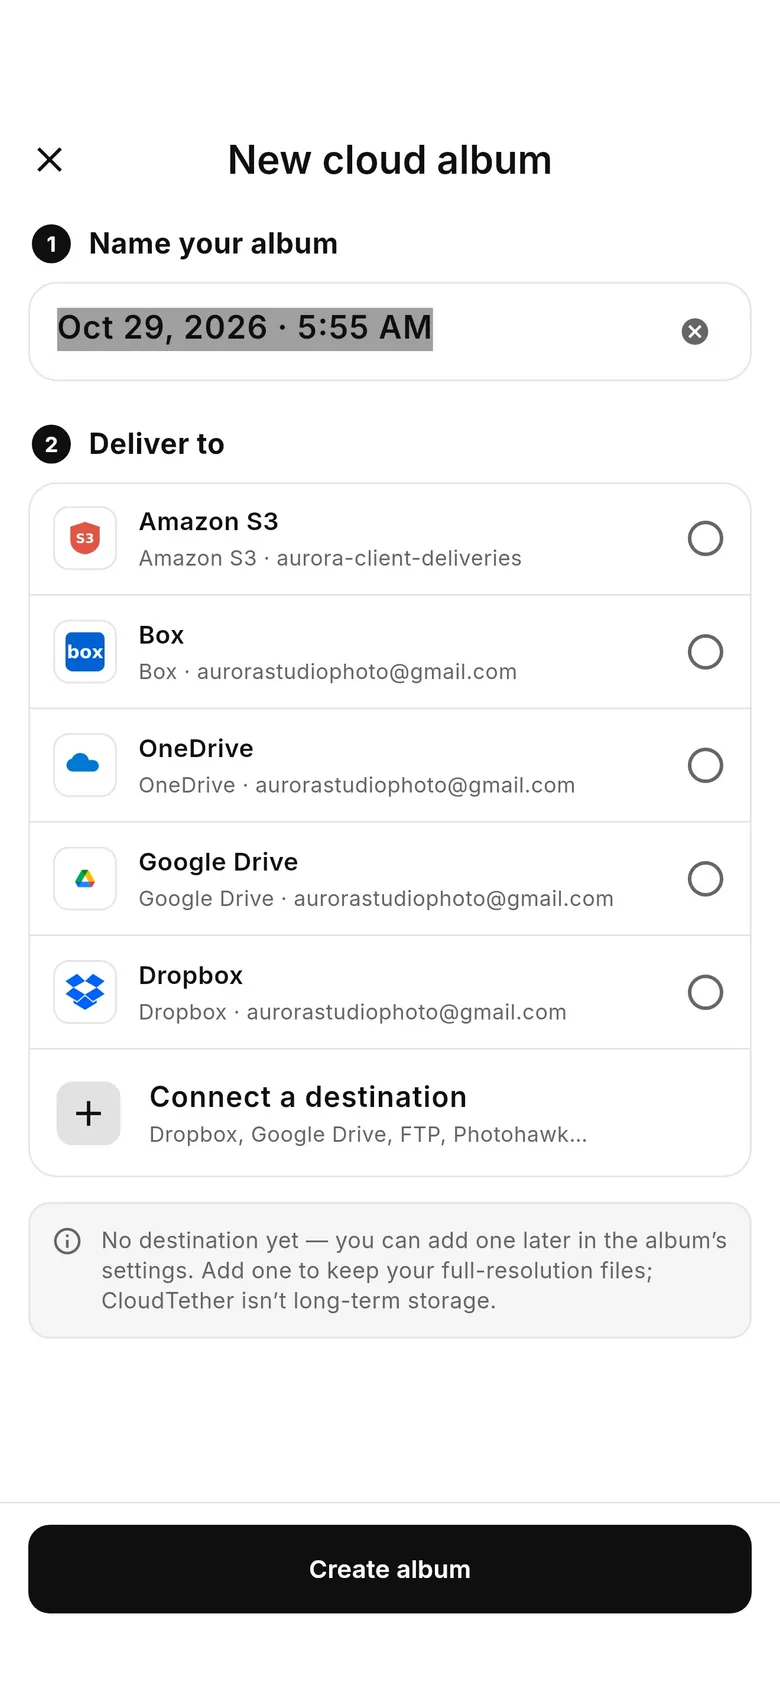
2Create a cloud album
Tap “New cloud album”. Name your album (it defaults to today's date and time), pick the destinations under “Deliver to” and tap “Create album”. The camera starts sending to it straight away.
3Reconnecting later
Each camera remembers its album and returns to it when it reconnects — check the camera's “Live upload → …” line before a new job and pick a new album if needed.