RAW files & delivery resolution
Send RAW + JPEG, and different sizes to different destinations.
You have control over what gets delivered.
RAW + JPEG
CloudTether ingests RAW and JPEG side by side (CR3, NEF, ARW, RAF, DNG and more).
Per-destination resolution
You can set a delivery resolution per destination — for example, web-sized JPEGs to a client gallery while full-resolution originals go to Dropbox or an FTP archive, all from the same shoot.
This lets clients get quick previews while your archive keeps the full files.
Connect Dropbox, Google Drive or another service
Add a destination once, then every shoot can deliver to it automatically.
Not sure which you have? 1.1 has the tabs Home · History · Deliver · More; 1.0 has Home · Playback · Destinations · More. What changed in 1.1
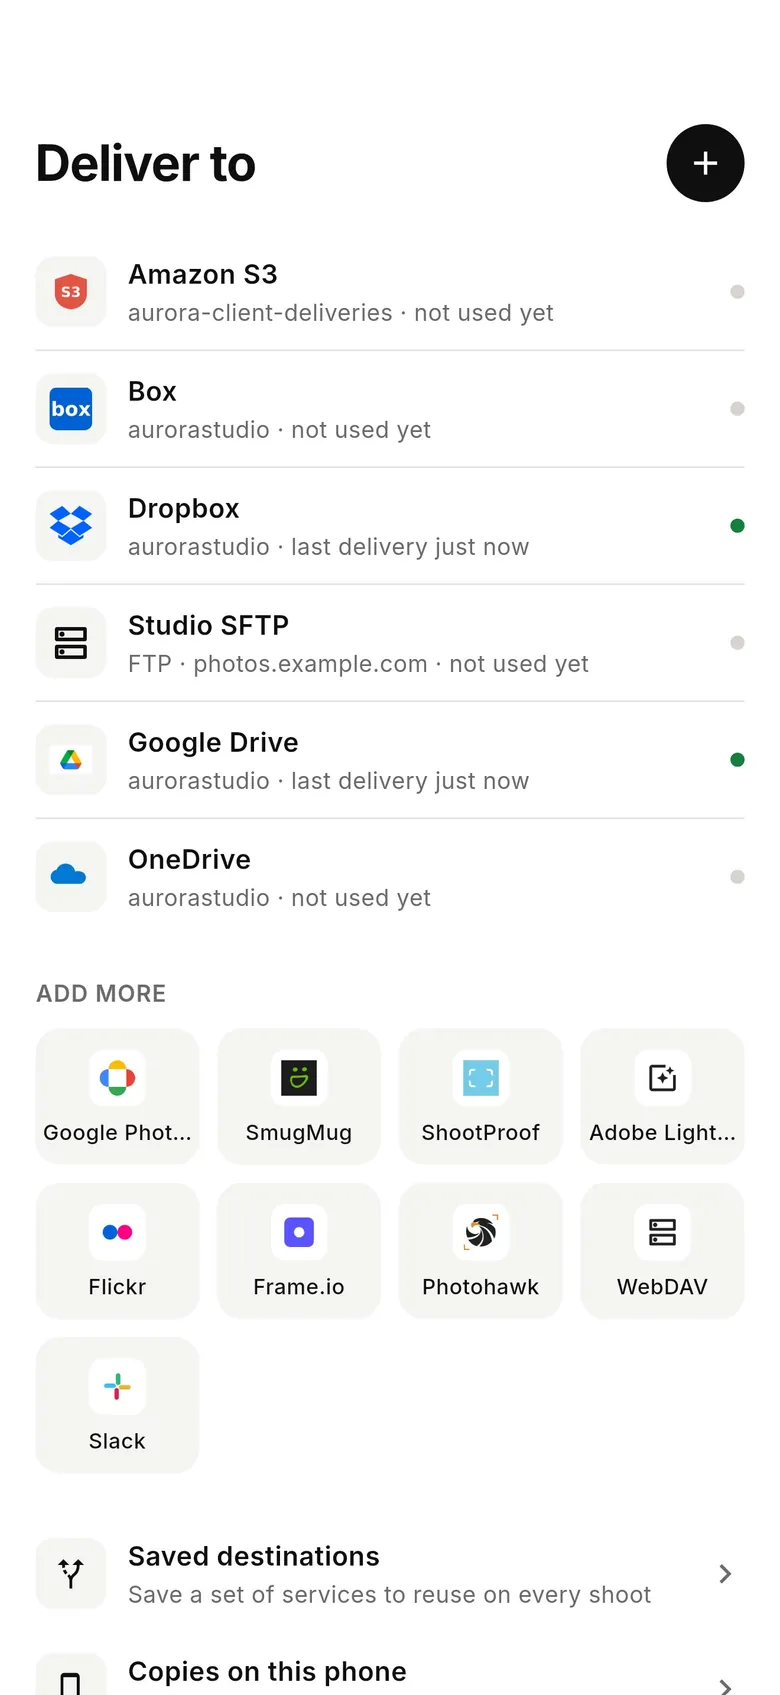
1Open the Deliver tab
Tap “Deliver” in the tab bar. Your connected services are listed under “Deliver to”; tap one under “Add more” (Dropbox, Google Drive, Google Photos, SmugMug, ShootProof, Frame.io, FTP, WebDAV, Slack…) or the + button, then sign in and approve access.
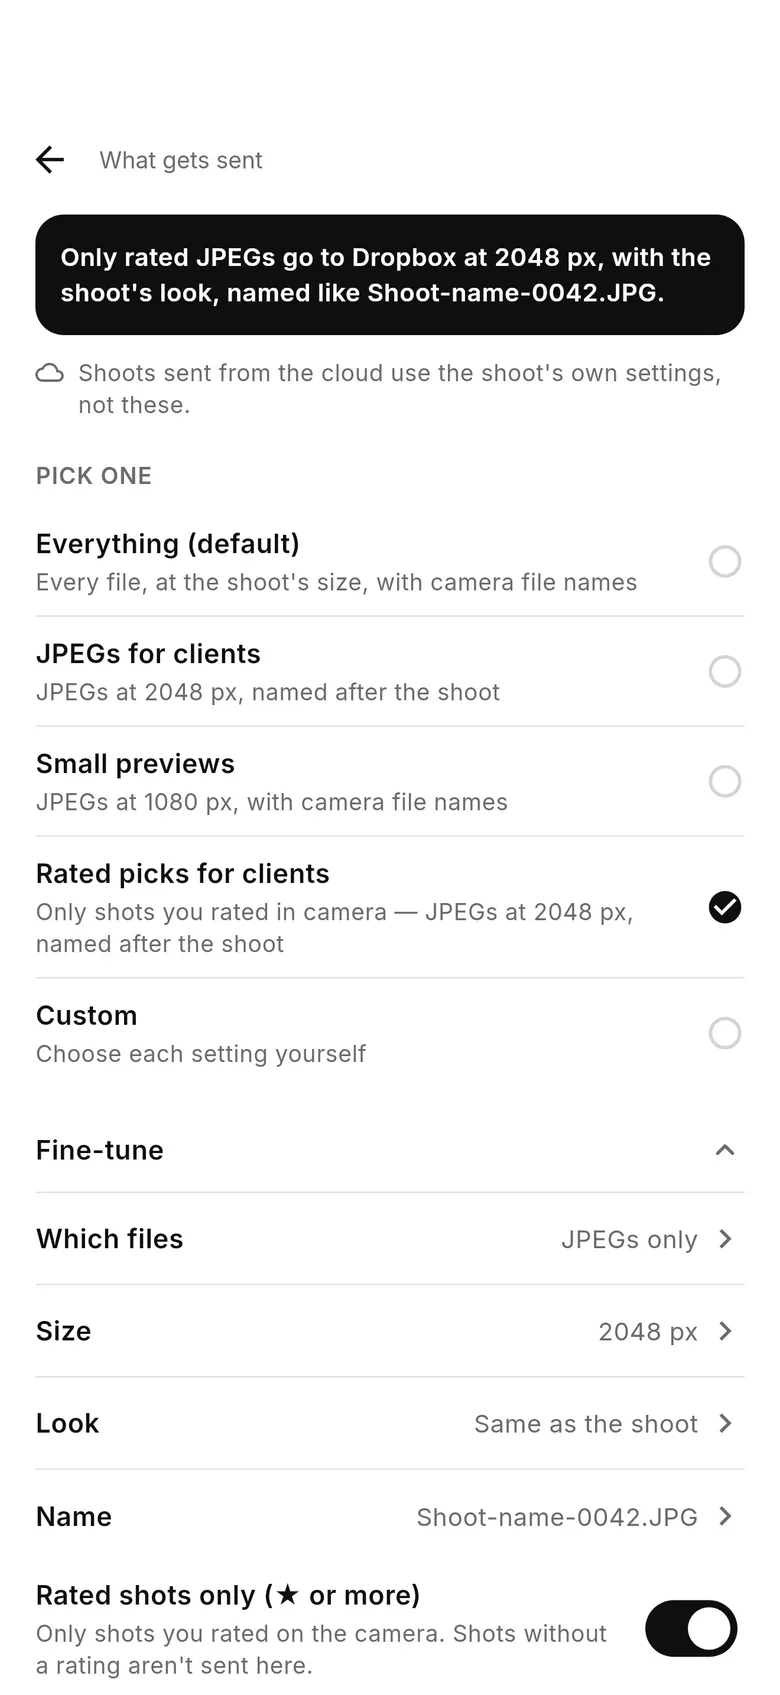
2Set what gets sent
Tap a connected service, then “What gets sent”. Pick “Everything (default)”, “JPEGs for clients” (JPEGs at 2048 px, named after the shoot), “Small previews” (JPEGs at 1080 px), “Rated picks for clients” (only shots you rated in camera) or “Custom”, and use “Fine-tune” for which files, size, look, file name and “Rated shots only (★ or more)”. If the screen notes that shoots sent from the cloud use the shoot's own settings, set size and look in that shoot's settings instead.
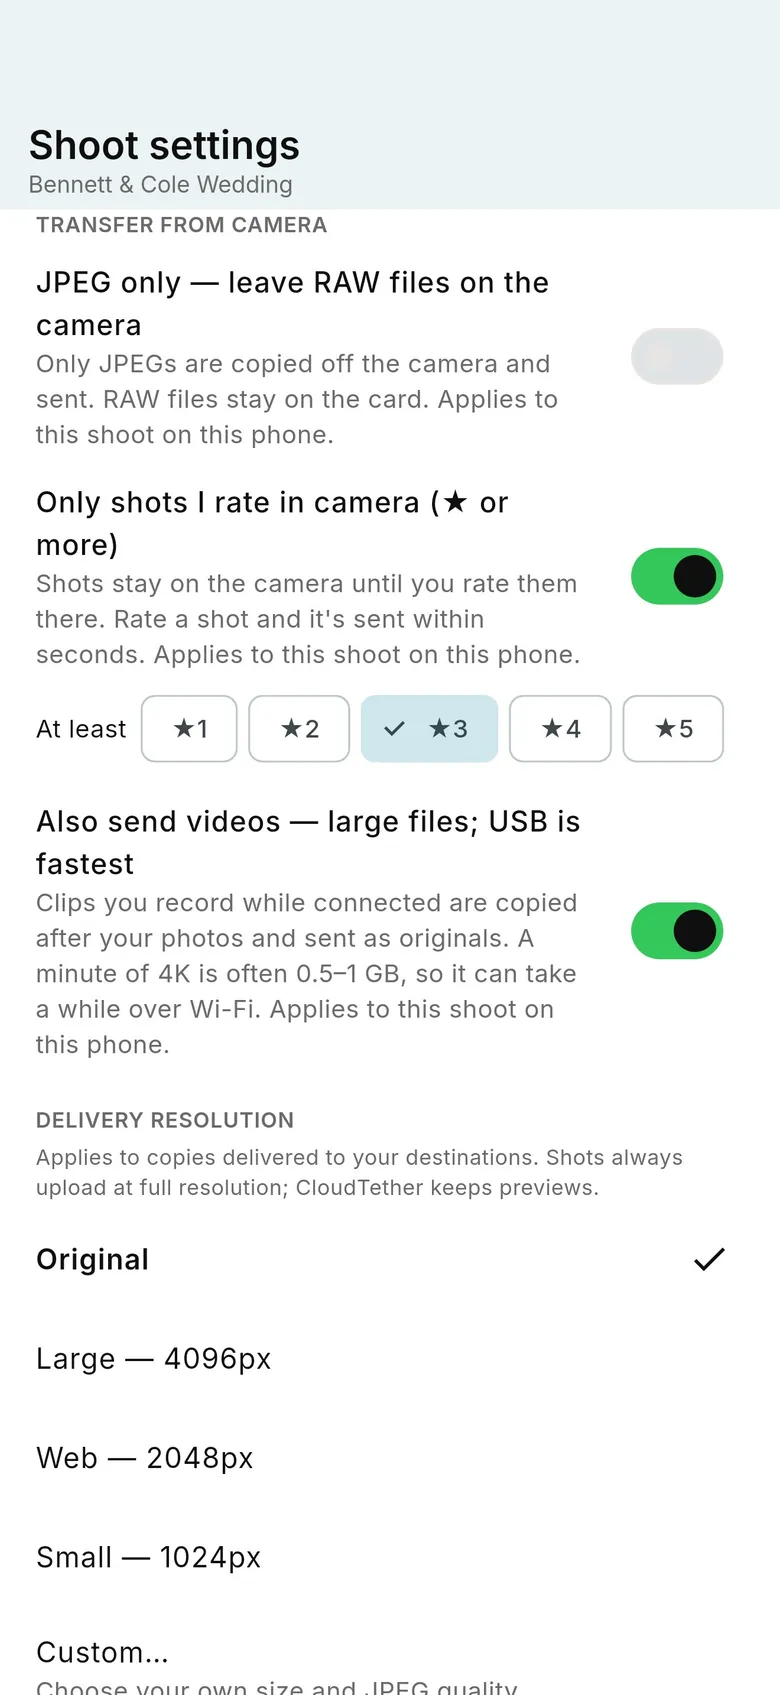
3Send only your picks (optional)
To send only the shots you rate on the camera, open the shoot's settings › “Transfer from camera” and turn on “Only shots I rate in camera”, then pick the minimum — “At least ★3”, say. “Also send videos” copies clips you record while connected; they're large, so USB is fastest.
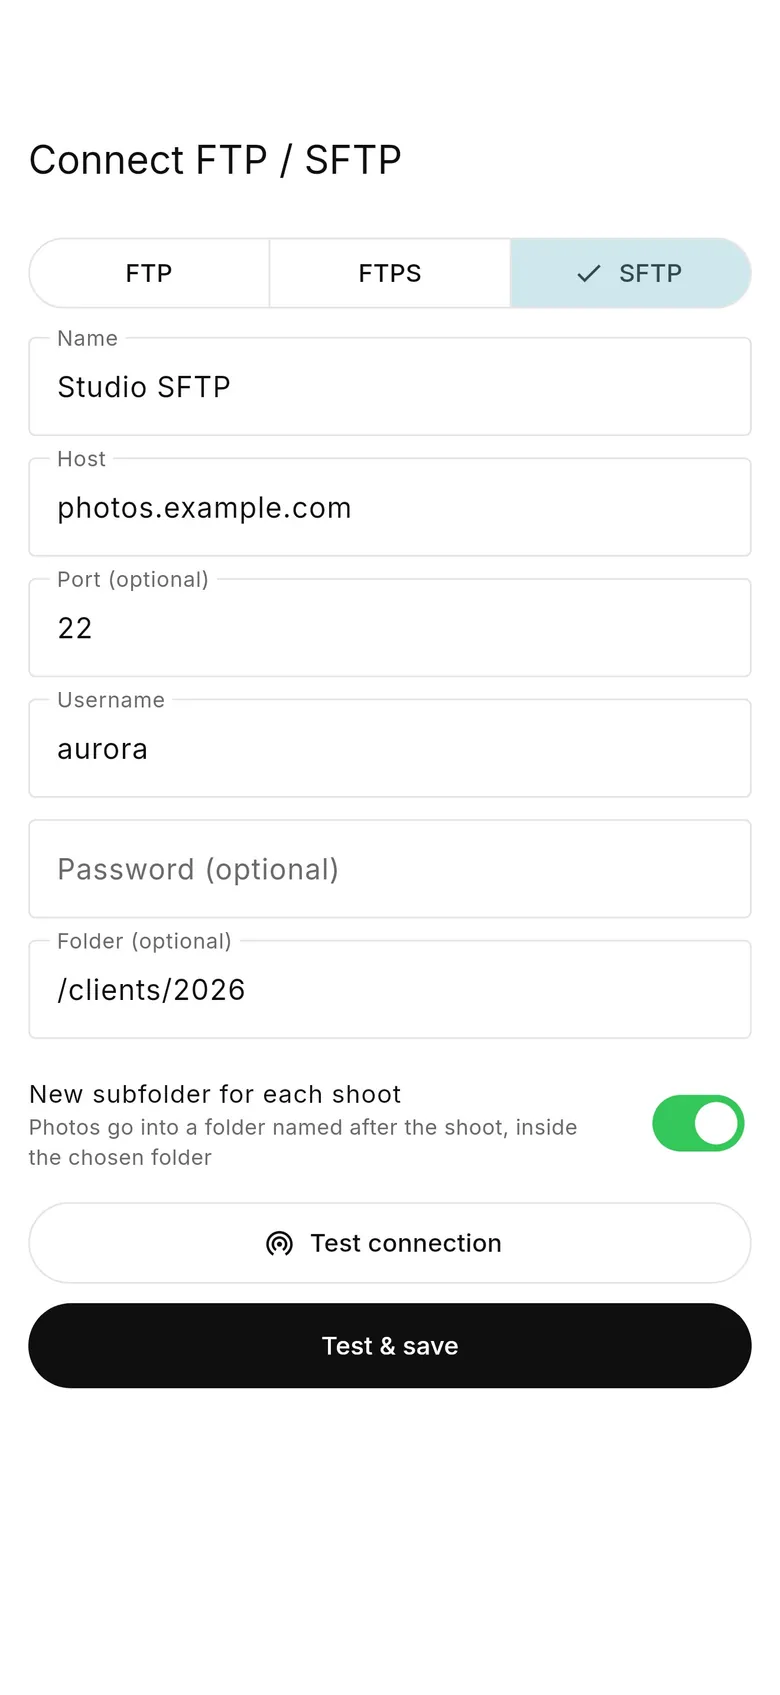
4FTP or SFTP server (optional)
Tap “FTP” under “Add more”, pick FTP, FTPS or SFTP and fill in the host, port, username, password and folder. “New subfolder for each shoot” (on by default) puts each shoot in its own folder inside the one you chose. Tap “Test connection”, then “Test & save”.
5Send a camera's shots there
When a camera connects, choose the service in “Send shots to…” › “Choose other services or folders”, or start a shoot from a saved set. By default a folder named after the shoot is created on the first delivery.
6Copies on the phone (optional)
To also keep copies in Photos, Files or on a USB drive, open Deliver › “Copies on this phone”.
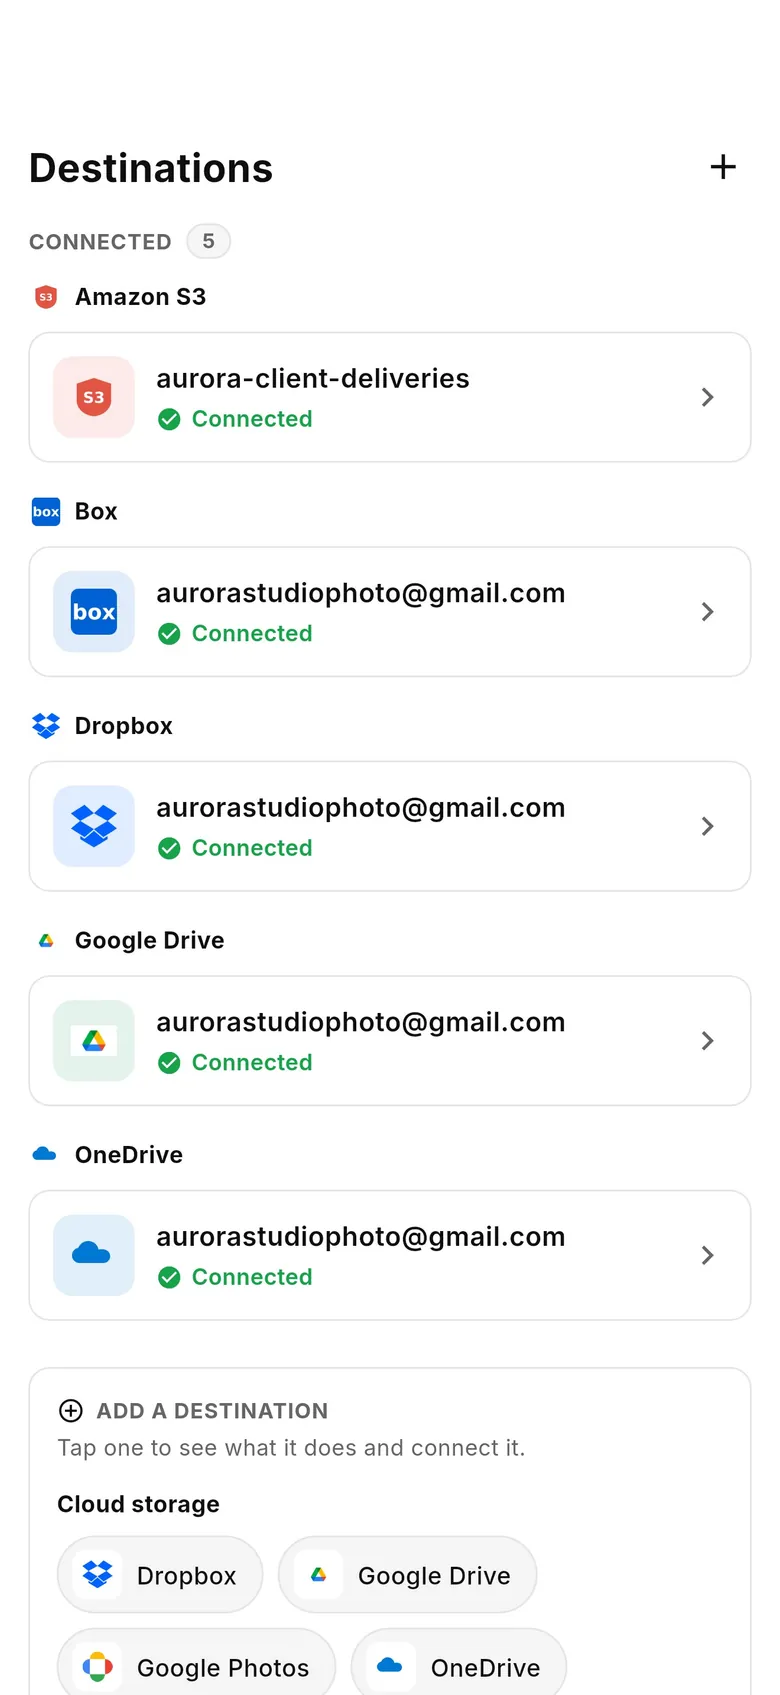
1Open the Destinations tab
Tap “Destinations” in the tab bar. Under “Add a destination”, tap a service (Dropbox, Google Drive, Google Photos, OneDrive, Box…) to see what it does and connect it — sign in and approve access. Connected ones show “Connected”.
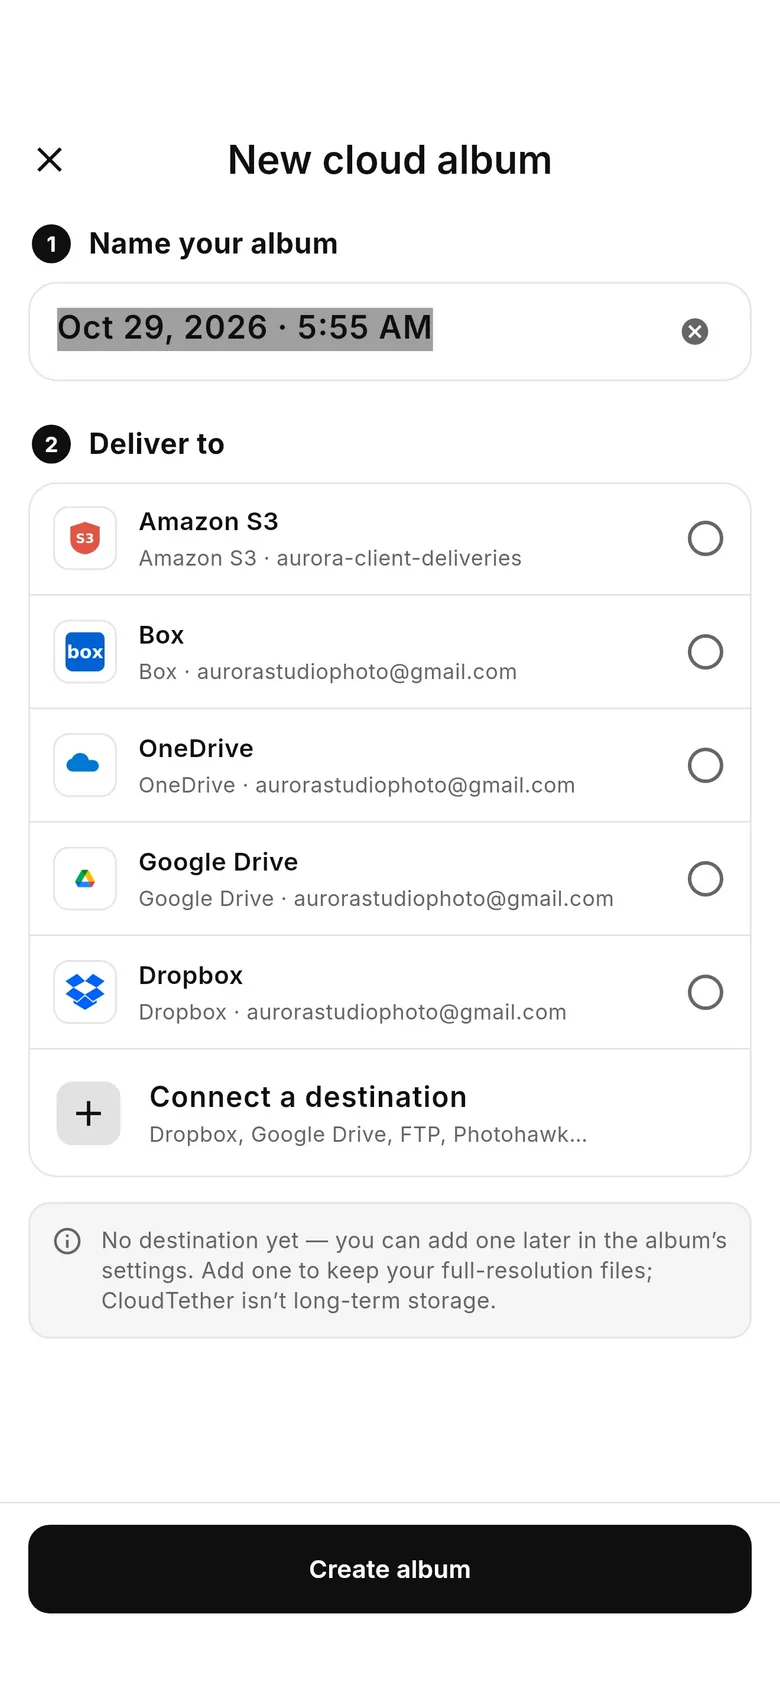
2Attach it to a cloud album
Create a cloud album and tick the service under “Deliver to” (or add it later in the album's settings). Every shot sent to that album is delivered to the service.
3Copies on the phone (optional)
Photos library, Files or USB copies are set up under Playback › Device › Sync.